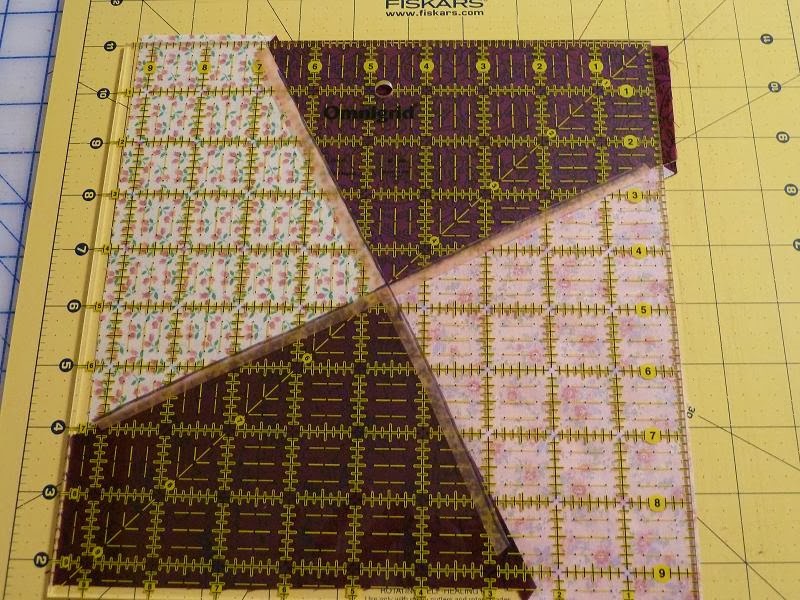
Piecing the Blocks
After cutting out the quilt and putting everything up on my design wall for my twister quilt, I was so excited to start piecing the blocks. (Check out this post to see my way of cutting out a twister quilt without the specialty ruler.) The blocks actually went together very easily. I thought I would do a mini-tutorial.
1. I laid out the pieces for my block.
2. I pinned the seams which needed to be sewn. Note: The pin just marked which side I needed to sew.
3. I sewed those seams starting at the right angle at the center of the block.
4. I pressed the seams towards the dark piece and laid the block back out. Because the block was sewn with a funny angle, the short side sticks out about a quarter inch.
5. Then I pinned the center point. Notice that the other edges just barely meet.
6. Sew that seam and press towards one side.
7. Lay the block on a rotating cutting mat.
8. Figure out what size you need to trim your blocks down to. I trimmed these to 9.25 inches. I added some Glow Line tape to the top of the ruler as a general guide. I still measured with the lines originally on the ruler.
9. Trim the right and top sides.
10. Rotate the mat, and trim the other two sides. The block now looks like this.
11. Place the block back up on the design wall and make sure all the fabrics line up with the surrounding blocks.
So, that is how to piece one block at a time. Doing that drives me batty, so I worked with a column on my design wall at a time (10 blocks). I would sew the bottom half of every block, pinning the side to be sewn. I kept them in order by stacking the pieces and chain sewing them.
After pressing the half blocks, I put them back up on the design wall to check their order.
Then I would pin and sew the top half of all the blocks. Followed by the center seam on all 10 blocks. I trimmed them individually and put them right back up on the design wall. I continued doing so until all the blocks were pieced.
Cutting and piecing the twister quilt this way, only created a small amount of waste. (Less than my last hour glass quilt.)
I now have the entire top sewn, and I totally love it!!! It is a nice twin-size quilt.
I hope you enjoyed this mini-tutorial. ;)
XX,
Jasmine


Thanks for the tutorial! I have it bookmarked, making one of these is definitely in my future! Love the fact that you figured out how to do this without the ruler!! YAY :)
ReplyDeleteWow Jasmine, you really went to town on that!! It looks absolutely wonderful.
ReplyDeleteActually, I did! That design wall really helps in doing a project like this. The quilt looks great! Your color distribution is very well done.
ReplyDeleteVery smart of you! It looks great.
ReplyDeleteYou clever lady! Love this - great tutorial and it's going to finish up wonderfully. How will you quilt it?
ReplyDeleteWell aren't you a smarty boots! Such a pretty quilt, and I'm super impressed. I'm with Jennifer: how are you going to quilt it?
ReplyDeleteVery cool!
ReplyDelete