Showing posts with label Tips. Show all posts

Tuesday, June 2, 2015

Variegated Thread Tip


When I first began machine quilting I loved variegated thread.  However, I stopped using it because I like to have matching thread in the needle and bobbin.  Or at least the same value.  Many variegated threads have a whole range of values from light to dark.  In the thread above (40 weight So Fine #703) you can see that the lime green is a lot lighter than the blues and purples.


I decided to try the variegated thread again, because this batik Turning 20 quilt really wanted some variegated thread.  (I pieced this for my mom to quilt on her machine a couple years ago.)

When quilting it on my mom's long arm, I had an "Aha" moment.  


While the bobbin thread and spool of thread are wound in different orders, you can still pull the bobbin thread up so the light areas match.  


I did that every time I started the quilting and pulled the bobbin thread up.  


That made it so that there weren't any dark spots from the bobbin showing in the light sections.  I was surprised with how well it worked.  I will definitely be using variegated threads a little more often now.  

Do you like using variegated thread for machine quilting?

XX,
Jasmine

P.S.  I will be linking up with some of the fun parties on my sidebar.  Check them out to see what other quilters are up to.  

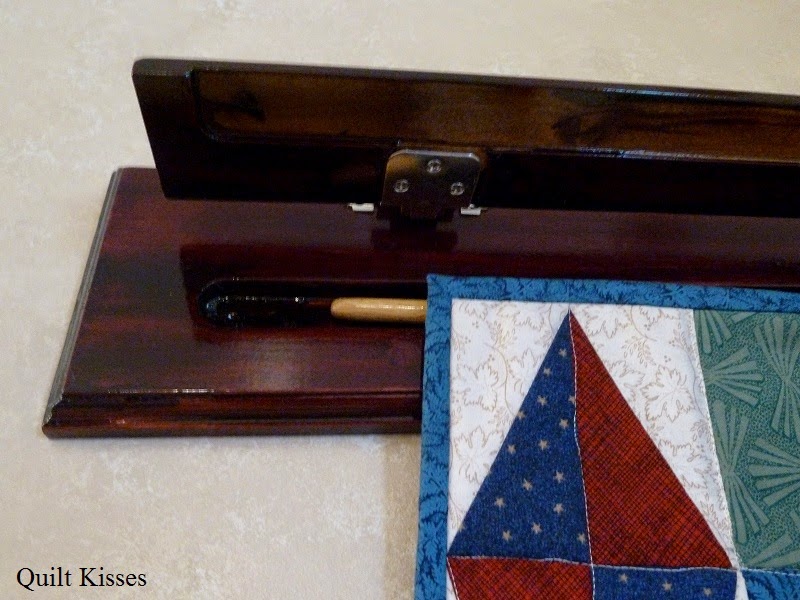
P.P.S.  I am still working on the tutorial for the quilt ladder.  I am hoping to have it finished next week.  

Wednesday, May 13, 2015

Fixing my Magic Carpet Quilt

I am happy to say that "Floating," my magic carpet quilt, is fixed.  The grease stain is gone.  How did I do this?  Let me tell you...


As a reminder, this is the before picture.


First, I tried some Dawn dish soap, the blue kind.  I left it on for a long time, then rinsed it out.  While it lightened a little bit, it was still very visible.


I asked around at the HMQS last weekend, and many seemed to think that the Dawn would not be strong enough for the black grease.  They recommended stronger cleaning agents like "Sew Clean."  I didn't really want to use anything stronger on my quilt, so I resorted to unpicking the pink rectangle which contained the grease.  I did this one evening after the boys were in bed.


The next afternoon, I carefully cut away the pink rectangle, still leaving a seam allowance.


Then I used cardstock to help me iron a new piece with a seam allowance.


I pinned it in place.  (This step was easier because all of the seams were originally pressed away from the light pink rectangle.)


Then I appliqued it into place.  It really wasn't any more work than it would be to add a large label.


Then I took it to my Tiara and quilted it with the same design.  6,700 stitches later it was all fixed.


I am pleased with how it looks on the front and the back.  (Cheetah thought it was a good thing that my backing wasn't a true solid, and I agree.)


I know that this may seem like a lot of work for one small  grease spot, but it was worth it to me.

The quilt is now all finished, and I will be sharing it as part of the Blogger's Quilt Festival this weekend.  So here is a sneak peek...


I totally love it!

I just wanted to add a big "Thank you!" to everyone who commiserated with me about the grease spot and offered suggestions for removing it.

XX,
Jasmine

P.S.  I will be linking up with some of the fun parties on my sidebar.  There is something fun for every day of the week.

Tuesday, March 31, 2015

A FMQ Light Bulb Moment


I have been doing a lot of reading in preparation for my Free Motion Quilting Basics classes which I teach at my LQS.  I have especially been reviewing these books.  


After reading through First Steps to Free-Motion Quilting by Christina Cameli a second time, something finally clicked.  Christina recommends quilting away from you in a counter-clockwise direction.  She says that this makes it easier to see what you have already quilted, so you don't run into your previous stitches.  

It was her words of a counter-clockwise direction that finally sunk in.  That is backwards from how I have always quilted with all over designs like meandering, loops, and swirls.  When piecing or quilting with the walking foot whatever you have just sewn goes behind the needle.  When quilting away from you, what you have just quilted is in front of the needle and you are pulling the quilt towards you.  Completely backwards!  

I believe that most techniques are worth trying at least once, so I have been experimenting quilting away from me for the past month since my first class.  It was difficult to wrap my mind around quilting backwards.  However, I have to say that I now absolutely love it!!!  

I have taken some pictures along the way to show how much better the view is when quilting away from you.  

In the following picture I am quilting my quilt Cherish with a flower design from Christina's second book (which she calls Cherish).  I have just finished one flower and have limited space between flowers to quilt before starting the next flower.  This is what my view would normally look like when quilting towards me.  


In this next picture I have drawn over what I just barely quilted with black and my previous quilting in blue.  


Now look at the difference when quilting away from me.  


It is much easier to quilt between those flowers.  


Especially when my cream thread blends in so well with the yellow.  

And my quilting machine (a Tiara) has a great view.  Imagine the difference it makes when quilting on a domestic sewing machine.  


There is a lot more machine blocking the view on a domestic.  And I have had crinks in my neck from peering around behind the needle before.  

I have also quilted away from me on my husband's quilt and my brother's quilt.  In the picture below you can see I am quilting away from me and to the right up into the corner.  


I have to say that not only is the view better, but I have less drag on the quilt itself.  I am now changing the direction I quilt an all over pattern.  

I will say that I think this only makes a big difference on all over designs when sitting down to quilt.  When quilting in rows like on this blue baby quilt, I still quilt one row away and the next row towards me.  (That keeps the design more continuous.)


I also don't think it would make a difference on block designs, because you have to quilt the entire shape anyway.  


In my second Free Motion Quilting Basics class last Saturday, I encouraged my students to try quilting away from them.  I think they liked the view better as well.  

As a side note, I just wanted to say that it was so nice teaching the same class more than once (same class different students).  This time I went in with more realistic expectations for what we could cover during the class.  I spent the first hour going over background information: batting, needles, thread, basting... Then went over starting to quilt and tension.  They then worked to get good tension on their machines.  After which I talked about doodling and different quilting designs.  Then they doodled before moving on to quilting those designs.  While I still wish the class could go longer than three hours, this is what the manager feels is best.  I will teach the basics class one more time next month.  I have a part two where we will quilt a baby quilt scheduled for next month as well, however no one has signed up for that yet.  

My students really liked my handouts.  Only one of them had previous experience with FMQ, and she especially loved the handouts showing multiple designs.  


I am looking forward to my next class and continuing to quilt with a better view!  Please tell me that I am not the only one who didn't know this.  What direction do you normally quilt?  

XX,
Jasmine

P.S.  I will be linking up with some of the fun parties on my sidebar.  Check them out to see what other quilters are doing.  

Wednesday, March 25, 2015

Pinwheel Quilt in Progress


A year ago, my sister-in-law came and picked out fabric in my stash for me to make my brother W a quilt.  She selected this cream and these green fabrics.  I am finally getting around to making it.  :)

The quilt is inspired by my friend Val at Val's Quilting Studio.   Last May she posted about a darling pinwheel quilt  she had made.  I immediately knew it would be good for my brother.


It goes together really fast, because my pinwheels finish at sixteen inches.  (Slightly bigger than Val's.)  I changed it up by using the background in the pinwheels, adding cornerstones between them, and making my borders slightly larger (3 inches finished.)  I spent one day making the blocks, and the next piecing the top.


I plan on having a minky backing and quilting it in big swirls/spirals.  I really love simple quilts!

And have you seen this pressing tip?  You put a magazine on your item while it is still hot from the iron and leave it on until it's cool.  (Read more about it here at Cluck Cluck Sew.)


It really helped my seams to lay flat, even where all eight points meet.


While I wouldn't use it for everything, it was perfect for pressing the final seam on the pinwheels.

XX,
Jasmine

P.S.  I will be linking up with some of the fun parties on my sidebar.  There is something fun for every day of the week.

Tuesday, March 17, 2015

Different Ways to Hang Quilts

{A Picture Heavy Post}


I love decorating with quilts.  I put them on beds, on tables, on the walls, and anywhere else I can think of.  ;-)  Anyone entering my house can immediately see that a crazy quilter lives here.  Today I thought it would be fun to show different ways I hang quilts on the walls.

One of my new favorite ways to hang quilts is on this drapery rod in my kitchen.


I love it because there is no need to add a hanging sleeve.  Just use the clips to hold it up.


I have also used other styles of drapery rods to hang quilts.  This one is in my basement.


The hangers just mount into the sheet rock, so it is not super secure.  However, I can still rotate the quilts I hang here.


We used  a small drapery rod to hang a mini quilt in Monkey's nursery.


One thing I don't like about this method is how far the little quilt hangs away from the wall.


In addition to purchased drapery rods, my handy husband has built many quilt hangers for me.  One of my favorites in this one in my living room.  It sits flush against the wall.


Which is really nice, because it is behind my front door.


He made it to the perfect size for all of my cover story quilts.  (Thimbleberries and my own designs ~ one quilt for each month.) There is a hinge which opens up and a groove in which a rod rests.  He even cut away some of the top board so no pressure is put on the quilts.


My husband also built this hanger which is in my stairway.


It is really nice, because he was able to mount it straight into the studs in the wall, but there is no shelf to collect dust.


Another one of his creations is in my craft room.  This one has a shelf I store my rainbow scraps on.


He was able to mount it to the studs through the back board on this one as well.  The rod just sets on the side pieces. This was the first quilt hanger he made for me ten years ago, and I still love it.


My mom loved this next quilt hanger so much that she had my husband build three of them for her.  Mine is in the basement hallway.


It also mounts into the studs and is really secure.  He drilled holes into the side boards for the rod to slide through.  Originally it was just a plain rod, but my boys kept bumping it and it fell down frequently.  So my husband cut the ends off and added these knobs which come on and off easily.  The rod no longer falls down and I can still rotate my quilts.


In some of the bedrooms we have quilts hanging up with just a plain dowel.


We used some Command Performance hooks to hang this one up.


The one on display in Monkey's room is a store bought blanket *gasp* which I added a hanging sleeve to.


This dowel slides in between a couple of push pins.  Whatever works, right?


And I will also admit that plain push pins are sometimes used for hanging quilts.


I have heard that used sewing machine needles would work even better for hanging a quilt like this.


Our newest way to hang a quilt was my hubby's idea.


He found these hooks at the hardware store that hold the dowel while staying hidden.


On my husband's quilt I used corner triangles and tabs with extra give to hold and hide the rod.  We used four of the hooks to hold the rod.


If you want the rod and the tabs to show, then you don't have to stitch them to the back.  (This is a little quilt I finished for a friend.  Her sister did the cross-stitch.)


And here's the back.


Most of the time I make a hanging sleeve with a little extra give on one side.  It helps the quilt hang straighter without rolling around the rod.  I sew one side in with the binding and stitch the other down by hand.  I usually cut the sleeves 6.5 inches wide and hem the sides.  Instead of ironing it in half, I will have one side be about a half inch wider (3 and 3.5).  It may look saggy, but it works great!


If I know it is going on an even thicker rod/dowel I may have an inch difference.


What is your favorite way to hang quilts?

XX,
Jasmine

P.S.  I will be linking up with Tips and Tutorials Tuesday, Let's Bee Social, and Can I Get a Whoop Whoop.  (Links on sidebar.)