

Please note that this tutorial/pattern was inspired by the HQ Machine Dust Cover for the Avante.
Check out this post for more information on how I developed this dust cover design.
My machine is the Baby Lock Tiara with a touch screen. If you have an older model machine that does not have the touch screen, you may need to shorten the front and side panels.

The only thing I wish I had changed was to cut my panels one inch longer so that it went over the cords in the back better. The instructions below reflect that change. In order to cut the panels at this longer length, you need a full 42 inches in your width of fabric after quilting.
All seams are 1/2 inch wide.
Materials Needed:
- 1 1/3 yards top fabric ~ I used 100% cotton fabric that was not directional
- 1 1/3 yards lining fabric ~ I used Kona White
- 1/4 yard accent fabric ~ I used Kona Black
- Batting about 44 x 50 inches ~ I used Warm and White
- 8-12 inches sew on Velcro that is 3/4 inch wide

2. Square up one edge and cut out panels:

- Cut two 8 inch strips by the width of fabric (about 42 inches).*
- Trim selvage off of each eight inch strip, cut one piece 14 inches long (Back Panels A and B), and one piece 28 inches long (Top Panels C and D)
- Cut one 28 inch strip by the width of fabric*
- Trim selvage off of the 28 inch strip and cut two pieces 17 inches wide (Side Panels E and F). Then cut one piece that is 7 x 17 inches (Front panel G)
3. Trim the top panels C and D (8 x 28 inches) on an angle so they are three inches shorter on one side.
On top panel C, draw a line from the upper left corner to three inches down from the upper right corner. Cut on line with ruler and rotary cutter.

Top panel D needs to be the mirror image of C. Draw the line from the lower left corner to three inches above the right lower corner.

4. Serge or zig-zag around the edges of your panels to finish them off. (I did not serge around the edges that would be covered by the binding.)

5. The seam allowance is a half an inch, but you need to start and stop a half inch away from the edge. Optional: Make markings on the lining fabric, so you know where to stop.

6. Sew back panel A to top panel C. Back stitch at the ends, but only stop half an inch away from the corner where the right angles meet.
Repeat with back panel B and top panel D.

7. Make a one inch hem on the inside (odd angle). Ease the hem at the seam.

8. Cut your velcro into one inch pieces. Add to the hemmed part of your top and back panels. I used the zig-zag stitch to sew the velcro in place.
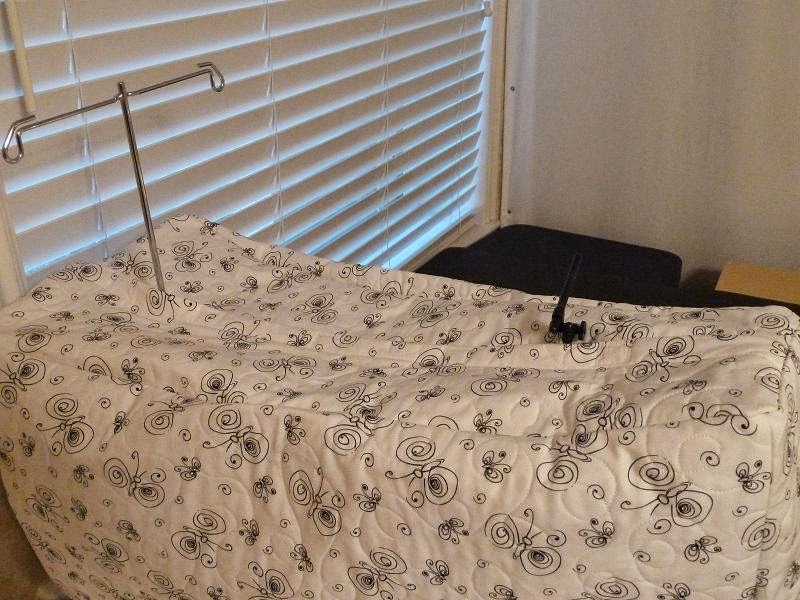
To decide where to add velcro, lay the panels over your machine to make sure there are openings around the posts sticking up.
I used a total of eight one inch pieces of velcro. Five pieces were on the top panel. Starting at the front (skinny) edge of the top panel I sewed the velcro 4.5 inches down, then there are four inch spaces between the rest of the velcro pieces . I sewed three pieces on the back panel about 3.5 inches apart starting one inch down from the seam.
Make sure the velcro lines up on both sides of your panels.

9. Attach the velcro to each other, and sew the top panels C and D (they will overlap) to 7 inch side of front panel G.

10. Sew the 17 inch sides of side panels E and F to front panel G.

11. Undo the Velcro, and sew the 28 inch sides of side panels E and F to top panels C and D.

The corners will look like this.

12. Sew the other 17 inch side of side panels E and F to 14 inch side of back panels A and B.

13. Experiment with how much you want to trim off the bottom of the side panels E and F. I did this by pinning a hem and then putting the cover over my machine.

14. Cut off the extra fabric on the bottom of side panels E and F.
I decided to leave four inches the 17 inch length, then cut the rest on an angle to the 14 inch length.

The other side panel is a mirror image of the first.

15. Use the accent fabric to bind the bottom edge of your dust cover. You can use your favorite binding method, but this is how I did it:
I cut two strips 2.5 inches wide and sewed them end to end on a 45 degree angle. Then I pressed it in half.
I sewed the binding strip to the top fabric with a quarter inch seam allowance, folding the edges in where I started and stopped.

I brought the binding around to the back and pinned it in place on the front. Then I stitched it in the ditch. (Don't sew over the pins.)

16. Put the dust cover over your sit down quilting machine and enjoy.


I would love to hear what you think about this tutorial and see pictures of your finished product.
XX,
Jasmine
Fantastic! Thank you so much!
ReplyDeleteWow...you are fast!! thank you. I will get together with a sewing friend and each make one. Not sure when, but we will post pictures when we do. this so so sweet of you.
ReplyDeleteThank you so much for this tutorial! I need to get one made for mine.
ReplyDeleteSuper job.....I do think I need to do this soon. Thanks for all your info.
ReplyDeleteThank you . i plan on making this next week.
ReplyDeleteThanks, Jasmine! I need to make this as soon as I can. My poor machine gets dusty!
ReplyDeleteGreat tutorial, Jasmine. I've bookmarked it for when I have my machine.
ReplyDeleteGreat tutorial. Now if I just had the machine to go under it! ;)
ReplyDeleteThanks Jasmine for writing this up! It looks terrific! I can't wait to make one!
ReplyDeleteThis is wonderful and just what I needed to find!! I have been wanting to make a cover for my machine for quite some time now... I just couldn't get "off-top-dead-center" (a naval term) I think it is much like getting stuck on a sandbar or something akin to that... Anyway, thanks for sharing!!
ReplyDeleteI love this cover! I just finished making it for my Handiquilter Sweet Sixteen and I love it. Like you, I had the pattern for the Avante but searched high and low for what actually fit the sweet sixteen. Thank you for adjusting this pattern and sharing it with all of us.
ReplyDeleteOh! I'm soooo glad I don't have to reinvent the wheel. Thanks so much for the tutorial! I think I love you! <3
ReplyDeleteThis is exactly what I am looking for. Thank you so much for the tutorial.
ReplyDeleteI hope you still monitor this particular blog. I am at Step 7 with the first hem of the back and top angled pieces. When you refer to the "inside (odd angle)" I want to verify that I am hemming the sides that I trimmed the triangle shape from.
ReplyDeleteThat is correct. The hem on the odd angle is the sides where you cut off the skinny triangles.
DeleteThank you so much for doing this, Jasmine. I just got my Tiara III and googled a cover for it and up your blog came! Now I can make a cover so my baby will not get as dusty. This is wonderful!
ReplyDeleteSuch a great blog post, Quilt Kisses! I used a lot of your tips to create a dust cover for my Avante 18 (their online directions were definitely not as much help as yours.) Because of your advice, mine turned out fabulous - https://whimziequiltz.wordpress.com/2017/02/04/its-a-tea-cozy-on-steroids/ I'll be dust free in 2017! Many, many thanks!
ReplyDeleteAM definitely going to have a shot at this. Not too sure about the velcro on the top - does it overlap?
ReplyDeleteThank you ! I plan to make one of these soon.
ReplyDeleteThank you so much. The quilted fabric will be my next practice piece. Your directions and photos are very clear.
ReplyDeleteThanks for sharing, Jasmine.
ReplyDeleteThank you so much for the instructions for the Sweet Sixteen Machine Cover, from Helen in Adelaide, South Australia. Just completed and covering my Sweetie as we speak. Best wishes for you and yours in USA at the moment.
ReplyDeleteThank you for quilt kisses pattern for the sweet sixteen! I would post my picture if I knew how
ReplyDelete