Showing posts with label Fixing a Quilt. Show all posts

Wednesday, December 21, 2016

Quilt Repair 101


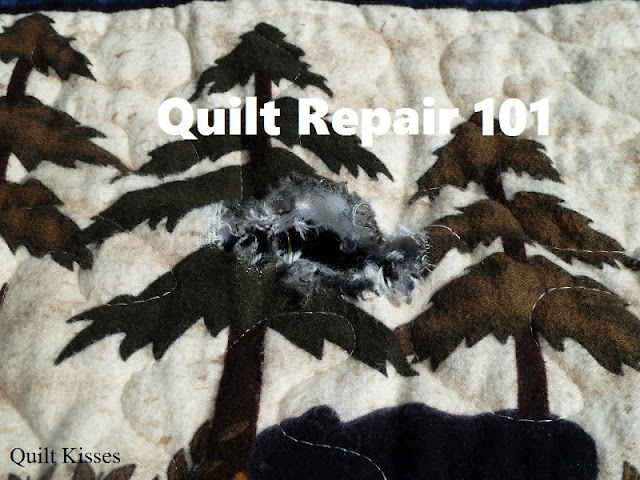
My mom and I finally got around to fixing my dad's cabin quilts.  (And I finally got around to blogging about it.)  I took a bunch of pictures along the way to show how we did it.  It ended up being easier than we expected.

A year and a half ago, I mentioned in this post and this post that mice got into my dad's cabin and damaged some quilts.  He has waited patiently (and not so patiently) for them to be fixed.  I was all for adding an applique of a leaf or something to cover the holes, but my mom wanted them to look like they had never been damaged in the first place.  When my dad would get frustrated he would just say, "just add a mouse trap and call it good."  (Thanks to Sandra for that piece of advice.)

Luckily, my mom kept the scraps and we were able to fix them so that they are almost as good as new.

First, we trimmed around the hole and added more batting.  (This is Hobbs Wool.) The batting was secured with a large whip stitch.


Second, we used a circle and some Glow Line Tape to try and mark points on the fabric.


Third, we used that template to cut out a circle from the scraps.


Fourth, we used a card board template and a running stitch to turn the edges under.


Fifth, we appliqued it by hand over the hole.


Sixth, we added a similar applique on the back over the hole.


Seventh, we quilted over the patches.


Eighth, we admired the fix.


It is really hard to see when looking at the whole quilt.


(Hint:  Look by the second bear from the right bottom corner.)

This same process also works for rectangular patches.


It feels so good to have these fixed and ready to be used.  My dad loves having them back at the cabin.  The beds seemed so empty without them.

XX,
Jasmine

P.S.  I will be linking up with some of the fun parties on my sidebar.  Check them out for more quilty inspiration.

Monday, March 21, 2016

Fixing a Custom Quilt


Believe it or not, but four years ago I was afraid of minky.  It was all because of this quilt.  This was pieced by Tammy, my mom's friend, and quilted by me.  You see, I used the knowledge and experience that I had and finished the edges of this quilt with the envelope method.  I had simply quilted some minky applique quilts for my mom and we had used the envelope method successfully.  However, when I quilted this one with more derail there was a big tuck on the back.


Minky does not hide tucks. at. all.  Luckily, Tammy loved how it turned out and never complained about my mistake.  I have learned a lot about minky in the last four years and have luckily moved past my fear of minky.  Yet, I felt sick inside every time I thought about this quilt.

Well, last month Tammy contacted me again.  She asked me to quilt another quilt for her second grandchild and wanted me to repair this quilt.  It is loved and used every day, causing some of the fabric and batting to wear through.  We discussed how I felt about my original mistake and she told me to not worry about it again because this quilt is so loved.  I feel so much better now and happily repaired this quilt.


This is Tammy's granddaughter's favorite corner.


The first thing I did was cut off the original edging.


Then I added a patch of batting and whip stitched it into place.


I cut a new stripe of giraffe fabric for each end and added it on top with my walking foot.


After folding the giraffe fabric over, I just quilted over the top through all the layers.


There is extra quilting which shows on the back, but it really blends in.


Then we added a traditional binding like I now do on all of my minky backed quilts.


The orange binding adds so much to the overall look of the quilt, and here is the favorite corner.


I made all of the repairs in one morning so her granddaughter wouldn't be without her quilt for one night.  While she can't find her favorite corner anymore, she is happy to have her quilt back and still sleeps with it every night.

XX,
Jasmine

Wednesday, May 13, 2015

Fixing my Magic Carpet Quilt

I am happy to say that "Floating," my magic carpet quilt, is fixed.  The grease stain is gone.  How did I do this?  Let me tell you...


As a reminder, this is the before picture.


First, I tried some Dawn dish soap, the blue kind.  I left it on for a long time, then rinsed it out.  While it lightened a little bit, it was still very visible.


I asked around at the HMQS last weekend, and many seemed to think that the Dawn would not be strong enough for the black grease.  They recommended stronger cleaning agents like "Sew Clean."  I didn't really want to use anything stronger on my quilt, so I resorted to unpicking the pink rectangle which contained the grease.  I did this one evening after the boys were in bed.


The next afternoon, I carefully cut away the pink rectangle, still leaving a seam allowance.


Then I used cardstock to help me iron a new piece with a seam allowance.


I pinned it in place.  (This step was easier because all of the seams were originally pressed away from the light pink rectangle.)


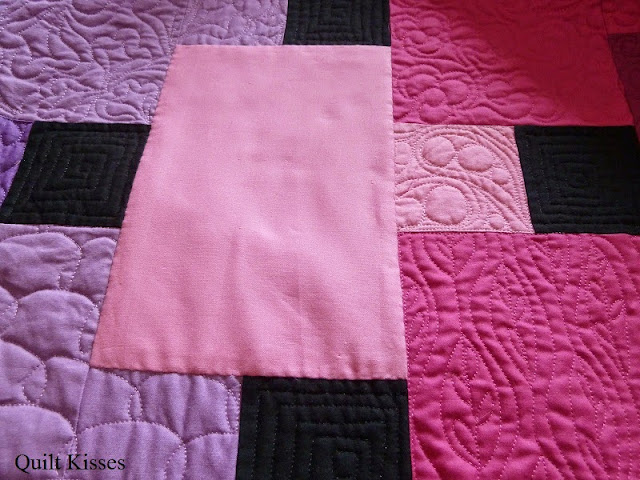
Then I appliqued it into place.  It really wasn't any more work than it would be to add a large label.


Then I took it to my Tiara and quilted it with the same design.  6,700 stitches later it was all fixed.


I am pleased with how it looks on the front and the back.  (Cheetah thought it was a good thing that my backing wasn't a true solid, and I agree.)


I know that this may seem like a lot of work for one small  grease spot, but it was worth it to me.

The quilt is now all finished, and I will be sharing it as part of the Blogger's Quilt Festival this weekend.  So here is a sneak peek...


I totally love it!

I just wanted to add a big "Thank you!" to everyone who commiserated with me about the grease spot and offered suggestions for removing it.

XX,
Jasmine

P.S.  I will be linking up with some of the fun parties on my sidebar.  There is something fun for every day of the week.