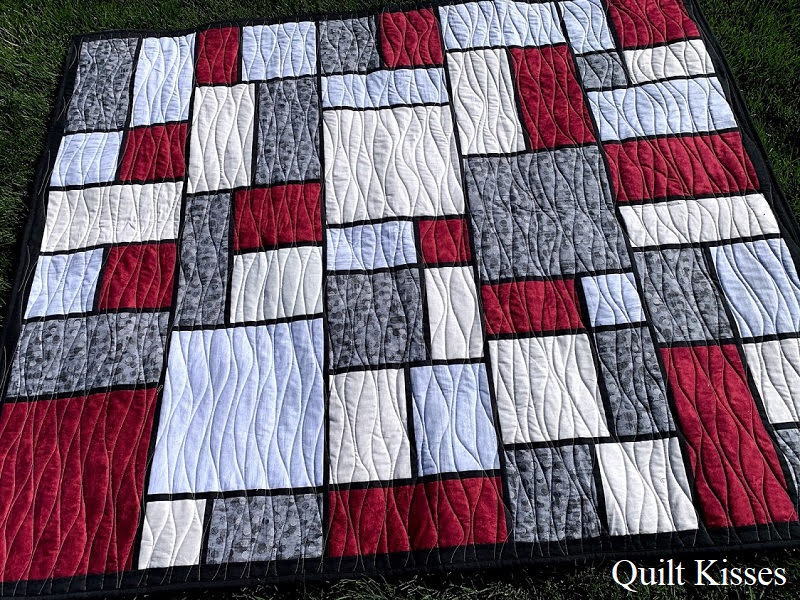
This is the quilt top I made for my nephew T and his fiance S. He requested a maroon and gray quilt. He said that it would be really neat if I could design it after his favorite artist, Piet Mondrian. Mondrian's work is mostly primary colors in squares and rectangles with black lines separating them.
I decided to make the quilt in blocks and rows to simplify things. I didn't want any partial seams. I used a simple trick which I learned from
Christina Cameli to make the block math easier. It you slice into a block and add a one inch wide strip, you don't change the size of the block at all. The one inch piece equals all the seam allowances.
I thought I would share my process here in case anyone would like to make a similar quilt.
I bought one yard each of four different fabrics plus two yards black for the outlines, sashing, border, and binding. (1.75 yards black was enough but I like to have extra on hand.)
I started by cutting out five 14 inch squares from each of the four fabrics. I put them all on my design wall. My plan was to make four each of five different blocks.
I cut the black out as I needed it to prevent fraying. I cut one fourteen inch WOF strip from the black fabric. Then I cross cut 42 one inch pieces. Four of them were cut down to 1 x 9 inch pieces. Then I cut six one inch by WOF strips for the sashing between rows. The border is seven 2 inch wide strips. The binding is seven 3 inch wide strips. (I like it extra wide when I have minky on the back.)
Block A is just a 14 inch square unfinished. So it was already done.
For block B, I cut one 14 inch square of each fabric in half. I mixed up the rectangles, and sewed one 1 x 14 inch black strip in the middle of each set. I always pressed towards the black strip.
There were two steps for Block C. I again cut one of each large square in half. Then I sewed one skinny strip between two 7 x 14 inch rectangles twice. (Using one of each fabric.)
Then I cut each of those pieced sets in half again. I added a plain 7 x 14 inch rectangle to three of them. I left one unsewn so that I could offset the blocks in the even numbered rows.
For block D I cut a five inch strip off of one of each large square. Then I added a skinny strip to sew the 5 x 14 inch rectangles to the 9 x 14 inch rectangles.
I once again cut a five inch strip from each set. I mixed them up, added a skinny strip, and got these four blocks. You can see that I didn't fully sew the upper right block together. That is to offset the even rows.
For block E I cut a five inch strip off of one of each large square. Then I cut the 9 x 14 inch rectangle in half to get two 7 x 9 inch rectangles each.
Then I mixed up the pieces so each block had three different fabrics.
I sewed a 1 x 9 inch strip between the 7 x 9 inch rectangles. Then sewed a 1 x 14 inch strip between those sets and the 5 x 14 inch rectangles.
I put all of the blocks up on my design wall. Row 1 has four full blocks. Row 2 has three full blocks and the two partial block D pieces on each side. Row 3 has four full blocks. Row 4 has three full blocks and the two partial block C pieces on each side. Row 5 has four full blocks.
Because each pieced block is still 14 inches (unfinished size) you can place any block any where and rotate however desired. I moved the blocks around a lot.
It was a little hard to visualize the end product, so I pinned up some one inch strips to see if I liked the layout.
I decided that I liked it, so I sewed each row with a skinny strip between each block. I sewed a long 1 inch strip between each of the rows. (That took six one inch by WOF strips. One and a half between each row of blocks.)
I wanted a slightly wider border, so I cut it out at 2 inches.
I love how the quilt top turned out. My art teacher sister said that she could definitely see the Mondrian influence. (She knew who he was. I had to look him up on the internet.)
This quilt is already finished, but I will share that in my next post. This one is already pretty long.
XX,