Friday, February 27, 2015

Chunky Race Quilts Finished


My hope was to finish all the baby quilts from my mindless sewing break this month.  Then I would be back down to two WIPs.  Here are the first three I finished on Tuesday and Wednesday this week.  Having them already basted and the bindings ready made for fast finishes.   All three of these are what I like to call chunky race quilts, because they were made with scraps cut 4 inches wide by 16-21 inches then sewn together like a jelly roll race.  I have made calculations for similar quilts.

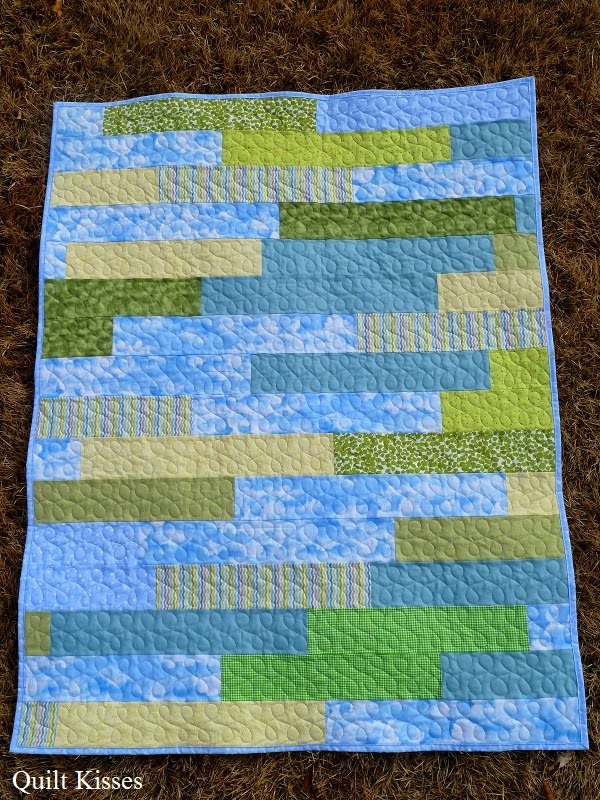
The first quilt I finished is "Sky Race."  This one used all of the light yellow, green, and blue scraps.  There were a lot of the cloud fabric strips, and I love how they ended up.  They just seem to float.


I quilted it with a cursive L up and down each row. I used a light gray thread.


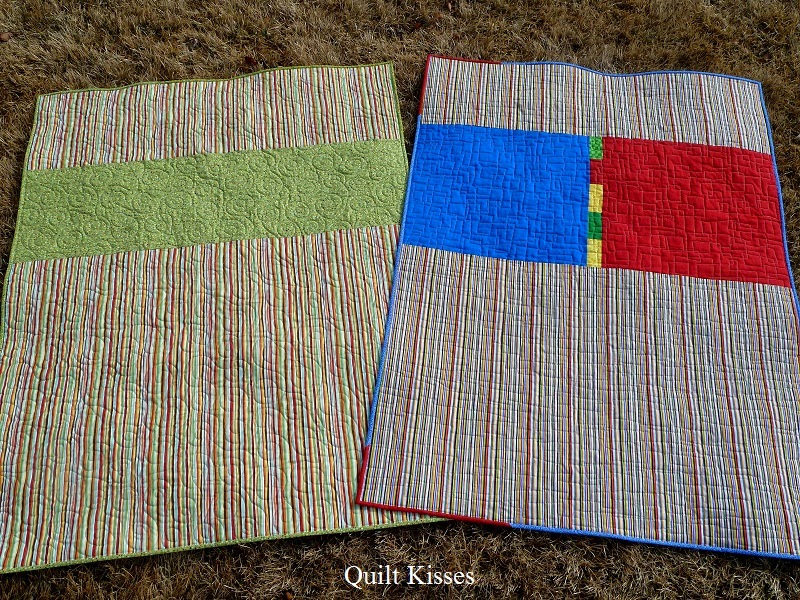
The row quilting looks really neat on the back.


I used the blue star print for the binding.


This was a really fun quilting design.  And I do love the overall effect.


Quilt Stats #129
Name:  Sky Race
Pattern:  Race Quilt Variation
Fabrics Used:  Sherrie's leftovers
Amount Used: 4 yards
Batting:  Hobbs 80/20
Size:  About 42 x 56 inches
Date Finished:  February 2015
What I learned:
  • Quilting in rows is lots of fun!  
  • Gray thread blends well with soft colors

On the next two I wanted to see how round verses boxy quilting would look on the same quilt.


One has a softer look, and the other is more modern.


Both the round and the boxy quilting were inspired by quilts Yvonne made at Quilting Jet Girl.

On the first quilt I did this loopy spiral.  It was fun quilting and went fast.


It looks neat on the backing as well.


The binding was a green funny dot print.


I am loving this quilt.


Quilt Stats #130
Name:  Bold Race 1
Pattern:  Race Quilt Variation
Fabrics Used:  Sherrie's leftovers
Amount Used: 4 yards
Batting:  Hobbs 80/20
Size:  About 42 x 56 inches
Date Finished:  February 2015
What I learned:
  • This loopy spiral is awesome 
  • Gray thread blends well with bold colors
On the second quilt I used a more boxy quilting design.


It did not flow as well for me.  Partly because it was boxy, and partly because the design overlapped itself.  But it does look neat on the back.  Next time I want boxy, I think I will try a spiral.


The binding is mostly blue with a little bit of red (which ended up at two corners).


I like the overall effect, but find I like the loopy better.


Quilt Stats #131
Name:  Bold Race 2
Pattern:  Race Quilt Variation
Fabrics Used:  Sherrie's leftovers
Amount Used: 4 yards
Batting:  Hobbs 80/20
Size:  About 42 x 56 inches
Date Finished:  February 2015
What I learned:
  • This is not my favorite quilting design  
  • Gray thread blends well with bold colors
I used the same Omni Light Gray thread or all three quilts. I love how it looks on the soft and bold fabrics.


These three quilts will live at my house for a little while.  I will use them as examples in my Free Motion Basics and More Free Motion Basics classes at my local quilt shop, until I decide where I want to donate them.  (We don't need that many quilts at my house.)

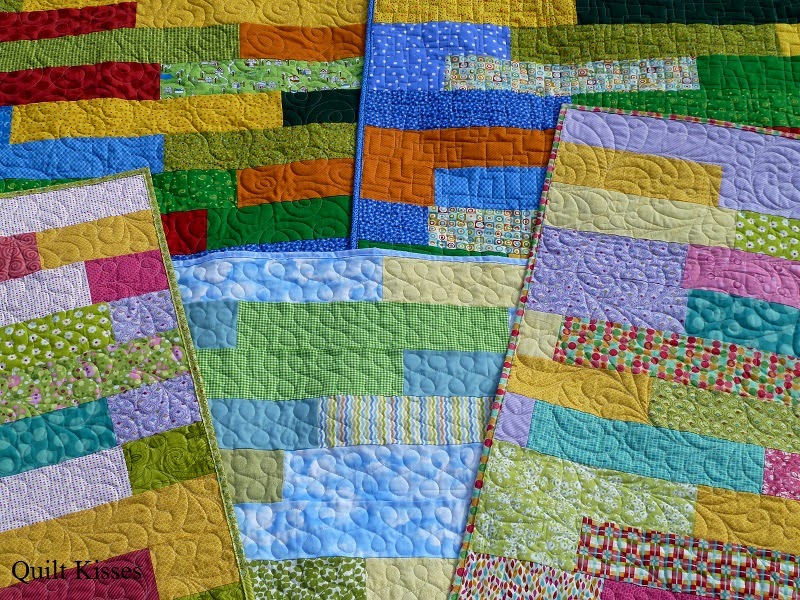
Here are all five of my chunky race quilts together.


All five are quilted a little differently.


You can read more about the feathered quilts here.

I finished one more quilt from my mindless sewing break last night, and now only have two more to go.  ;)

XX,
Jasmine

P.S.  I will be linking up with some of the fun parties on the sidebar.  There is something fun for every day of the week.

Wednesday, February 25, 2015

Fruity Flavors: A Rainbow Finish


This quilt was simple and so much fun to machine quilt.  It is another class sample for my Free-Motion Quilting Basics class taught at my local quilt shop.  (I talked about my experiences teaching in my previous post.)

I quilted it in Aurifil 50 weight thread in matching colors to the Kona Bright Peri, Water, Lime, Canary, Carrot, and Bright Pink.  (I have a tutorial for piecing the simple quilt top.)


Originally, I was going to demonstrate quilting on it during my  FMQ Basics class.  But due to the time limits (only three hours for the class), I thought it would be more beneficial to have a finished quilt to show in future classes.

Edited to add:  The manager at my local quilt shop and I have decided to split up my original class into two separate classes.  The first class will be all the basic information and quilting on small practice pieces.  The second class will be putting their skills to use on a simple baby quilt.  This simple fat quarter quilt and the simple stripe quilt are what we will be using.  I'm very excited about this change.  

I quilted this quilt to show that you can change a simple aspect of a free motion quilting design to achieve a different look.  For example, on the yellow section I quilted the traditional stipple or meander.


Then on the blue I kept the wiggles going in a horizontal direction.


It looks a lot more like water.

On the purple I quilted what Leah Day calls a sharp stipple going in all directions.


Then on the orange I quilted it mostly going up and down.


While some people see flames, I always see tiger stripes.  ;)

On the pink I quilted a loopy line.


I changed it up on the green by using two different sizes of loops.


Having the  different loop sizes together is super cute and perfect for people who have a hard time keeping the loops at a consistent size.

I quilted this on my domestic sewing machine with a six inch arm, and had to make sure I didn't go too fast and make my stitches too big on the larger circles.  You can get eyelashes on the back when the stitches get too large around the curves.

All together, this makes a really fun quilt which Monkey loves.  When I laid it on the floor, he sat on each square saying, "This one is my favorite" before moving on to the next square and saying the exact same thing.  I still don't know which one is is favorite, although orange is usually his favorite color.  Maybe his true favorite color is "rainbow" like his cousin.   For the picture he had to claim as much of the quilt as possible and laid down instead.


When I tried to get a picture of just the quilt, he snuck his foot in.


He wasn't too happy when I turned it over to get a picture of the backing. He wanted to see the colors.


 (I also have a tutorial for piecing the simple backing.)

I matched the bobbin thread to the top thread for each color, and you can't really tell from the back that there are seven different colors of thread.  (I used light gray for stitching in the ditch.)


I love the Riley Blake wavy stripe for the binding.  Can you spy the one little heart I quilted on the pink?  The black and white looks cute with the rainbow, and pulls out the black and white flowers on the backing.


I added my favorite corner label to complete the quilt.


Cheetah is the one who named it "Fruity Flavors" when we were laying out the blocks on the design wall.  We had to balance the berries and citrus fruit colors in the quilt.

This was a layout we decided we didn't like.  
I love that even simple quilting can give a quilt such great texture.  Here is the unquilted top.


And here is the finished quilt.


Both pictures were taken in front of my house at the same time of day.  (I don't normally take pictures in the front yard, but that is where the sunshine is in the late afternoon, early evening.)

Quilt Stats #125
Quilt Name:  Fruity Flavors
Pattern:  Simple Fat Quarter Quilt
Fabrics Used:  Kona solids (see above for the list of colors)
Binding:  Riley Blake
Backing:  It's a Party by Fabri-Quilt
Amount  Used:  4 yards
Batting:  Hobbs 80/20
Size:  About 42 x 54 inches
Date Finished: February 2015
What I Learned:

  • Even super simple quilts can be darling and well loved.
  • Solids show the quilting a lot, but mistakes can still be not too noticeable if using matching thread.  
I also used this quilt in my spray basting tutorial.  It was quick, simple, and so much fun to make.  

XX,
Jasmine


P.S.  I will be linking up to some of the linky parties on my sidebar.  Check them out.  There is something fun for every day of the week.

P.P.S.  A big thanks goes to Daines Cotton Shop for providing some supplies for this quilt.

Tuesday, February 24, 2015

My First Time Teaching!


I taught my first Free-Motion Quilting Basics class last Saturday.  It was so much fun, and quite the learning experience for me.  My biggest lesson?  Three hours goes by very fast!  We weren't able to get nearly as much done as I would have liked.

There were six women who took my class.  (A perfect size.)  Only one of them had ever tried free-motion quilting before.  So we went over the background information:  batting, needles, thread, marking, basting...

The students said they loved my handouts.  All of the information I covered was included in the handout.  I reminded them to remember that it was "Battings (or whatever) according to Jasmine."


I even included some simple designs I drew from different types of lines.  But recommended these excellent books.  (I borrowed a couple from my mom.)


Once we went through the background information we spent a while working to get a good tension.  That took a little longer than expected, but I was able to help them all individually.  I used Christina Cameli's method for checking tension.

After they had good tension, we went into the designs.  My new magnetic dry erase board sure came in handy.  Plus, I had made myself a new FMQ design sketch book, and it helped explain things quickly without me having to draw everything during the class.

I showed them how simple shapes could become more complex to form the traditional stipple.  This approach came from one of Leah Day's quilt alongs.


That seemed overwhelming, so I was able to show that it is okay to quilt in spirals and rows.


And that the quilting can be changed a little and even simplified.  (These wiggle designs came from Christina Cameli's books.)


After demonstrating for them, I had them sketch the designs before stitching them.

We didn't have time to quilt on the actual quilts some of them brought  already basted, so I strongly encouraged them to jump in and continue quilting at home.  That is what I did when I took my first FMQ class years ago.  I even brought my first machine quilted quilt (or quillow) in to show them (finished in 1999).


In addition to that first quilt, I also brought seven other big quilts and ten mini quilts/table runners.  I think it helped to have examples for a lot of the things I was explaining.  Like density and matching bobbin/needle threads.

It was also nice showing them you can quilt big quilts on little machines.  One quilt I brought in was this queen size one quilted on my littlest machine in 2003.


(I like the back better than the front.)


I demonstrated on one of their smaller machines how I stuffed it in the small space.  Although I must add that having my machine flat in a cabinet really helped!

I told them that learning to free-motion quilt is like learning to ride a two-wheeler.  (Something Panda has been working on diligently.)


You have to learn to use the pedals, watch your speed, watch where you are going, and balance everything.  Good tools (like the helmet) and a working machine (bicycle) are so important.


It takes effort (and sometimes a little help) to find the balance and enjoyment.


But you have got to put your foot on the pedal and get going!

When Panda was ready to give up, we kept telling him that it would take at least a month to really get it.  Quilters need to give themselves time to learn new skills as well.

At the end of the class I asked them if I talked too much, and they said they appreciated what I had to say.  That made me feel better.  However, I loved it when a couple of them said, "This was exactly what I needed."

I will be teaching the class two more times, so I finished up the second class example.  I hope it will give my future students some ideas.


I used two different styles each of stippling, loopy lines, and jagged lines.  It is neat how changing something like the main direction can alter the entire aspect of a quilting design.  There will be more on this quilt, which Cheetah named "Fruity Flavors," in another post.

Edited to add:  After all of your sweet comments and suggestions, I talked to the manager to see what we could do.  We have decided to start a second class in April.  The focus in the first class will be the very basics and background information.  The focus in the second class will be putting the skills to use on a baby quilt.  The funny thing is that just after we discussed this one of the students in my class last week suggested part 2.  Great minds think alike, right? ;)

I also want to thank everyone who has cheered me on in this new endeavor.  I really enjoyed teaching this beginning class at my local quilt shop.

XX,
Jasmine