
I watched the videos for the first week, practiced drawing for a couple days, then watched the videos for the second week. I am so glad I did. The first week Suzanne has you practice the motions of over the top feathers, and the second week she teaches what makes for pretty feather shapes. I figure if you are going to practice, you might as well practice correctly. So I combined the first two weeks into my practice.
In addition to working on my Modern Farmer's Wife, I have also spent a lot of time doing this (not my best drawing, because Monkey kept trying to take over)...
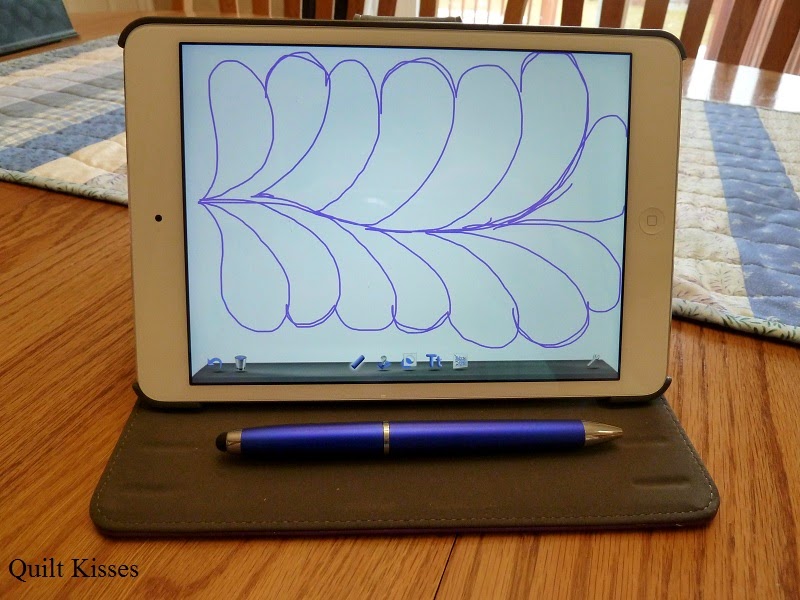
This is an app on my iPad called Doodle Buddy, and I have been practicing drawing feathers with the special end on this pen. It is nice, because you can draw on pictures (which my sons use to give each others beards and mustaches). I was able to easily trace the feathers in her handouts. She recommends drawing feathers for fifteen minutes a day, but I probably did a lot more than that. I took my iPad with me a lot of places and drew whenever I had free time (like in the parking lot when waiting for my boys to finish school).
Then at the end of the week, Suzanne has you practice stitching feathers on the machine. I normally make whole cloth quilts to practice free motion quilting (nice to make something useful) but I thought it would be nice to use muslin so I could see what I was doing better. I decided to try something new and use up my batting scraps. The kind that were 3-5 inch strips. The kind that I didn't want to take the time to zig zag together and almost put in the trash.

It may be a little hard to see, but I put the muslin down on the back of an old cutting mat. I used basting spray on the wrong side of half of the width of fabric. Then I laid the batting strips on the top. It was like a puzzle and kind of fun. I didn't even trim down or square up the batting before using it. You can see that there were some little gaps in the batting, but it wasn't a problem at all.

After the muslin was covered, I used the basting spray again on the batting. Then I smoothed out the muslin over the top. I used more than 4.5 yards of muslin and emptied my small scrap batting bag. I used some of the quilt sandwiches that night, and have more for other weeks. :)
As a side note, if the batting is more than 12 inches wide I will zig zag it together to make frankensteined batting for quilts.

Here is my first practice piece. I used my Frixon pen to draw lines two inches apart and kept the vines straight. I tried quilting in all directions, but kept wanting to turn the fabric to quilt the feathers in the same direction. I quilted the center feather twice to see if I could improve the shape a little.

To shake my practice up, I drew a boxy spiral and quilted it without turning the fabric. I basically forced myself to quilt feathers in all directions.

I was having so much fun that I didn't want to stop. I drew more lines on another sandwich with a curved vine. Then quilted it in different directions.

I can already see a big difference in my feathers using this over the top method instead of what Suzanne calls long arm feathers.
I quilted all three of these samples with my Baby Lock Tiara. The batting which was just spray basted worked great! And another nice thing is that I was able to empty seven partial bobbins. I usually like to start with full bobbins when working on a project, so this was perfect for finishing up the left overs of different colors. :)
I highly recommend Suzanne Earley's class. Her videos are helpful and the handouts are fantastic. This link, Feather Boot Camp, will take you to the table of contents for her class.
XX,
Jasmine
P.S. I am linking up with Cynthia at Quilting is More Fun than Housework for Oh Scrap. She said that using batting scraps would count for the linky. :)
Great use of all those batting scraps! I keep them around for just this sort of thing, too. I am definitely intimidated by feathers, so I think I will go follow the link and start a little bit of practice drawing.
ReplyDeleteWonderful feathers, you are doing great!! Thanks for the link to my blog
ReplyDeleteNice work!! My friend(also a Vicki) and I were lucky to be among Suzanne's first students for this class that she held in her home several years ago. It was this class that made the feather lite bulb go on for me. I had had other feather classes and it just didn't work for me.
ReplyDeleteFeathers can be a bit intimidating but yours look wonderful. Great job teaching yourself to quilt them in all different directions. I like how you used your batting scraps and folded over the fabric for a quilt sandwich. I will have to remember that! Thanks for linking up this great idea with Oh Scrap!
ReplyDeleteLooks like it is paying off!!!!
ReplyDeleteI LOVE this!! I love your feathers, and I love your batting scraps (phew! justification that I am not "CRAY-CRAY" to keep most of my scraps, lol) I never confessed that I would franken-batt because I thought people would think me loopy, but I've seen a few people doing this now. Yours, however, is a top-notch use of small scraps. Quilting feathers is harder than it looks, and uber-hard to do in all directions, but so much fun when you can get the hang of it. Awesome work. And, I will have to check out the app you mention. Great informative post. :-)
ReplyDeleteWow... Your feathers look amazing! You have a great ability to learn quickly it seems.
ReplyDeleteWow! I'm going to have o give this a go as I really want to learn feathers. If your results are anything to go by it shouldn't be too hard at all!
ReplyDeleteThanks for the tute, I pinned it!
ReplyDeleteGood job with the feathers, practice makes perfect!
Feathers are the one thing that I don't like to do because I can't! Your's look great! Thanks for the encouragement.
ReplyDeleteThey look fantastic. I tried feathers once without practicing much and they were awful! I'm going to check out that link!
ReplyDeleteLove these learning techniques!
ReplyDeleteYour feathers look great! Thanks for sharing the link...I'm off to check it out.
ReplyDelete