Thursday, September 29, 2016
Monster Train: A Finished Quilt
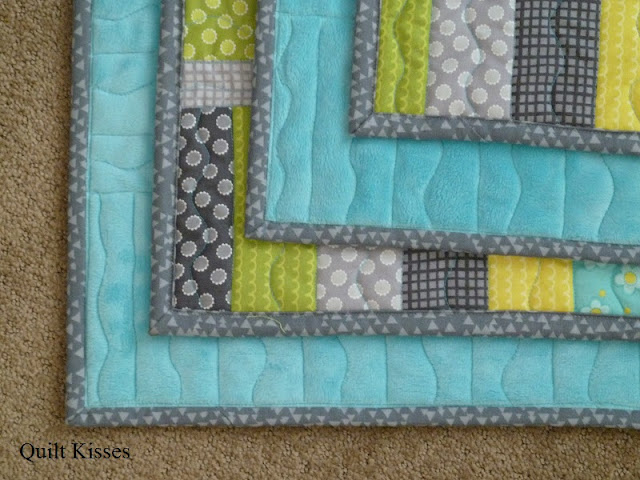
Monkey is very happy that his new quilt is finished. He loves dragging it around the house and taking it for rides in the car.
Either that or he is playing Legos on it like his big brother. (The orange is brighter than it shows in the pictures. Minky is hard to photograph.)
It is folded on his bed when he is not using it. I love seeing it so close to his Monster Alphabet quilt.
They were both made with the Silly Gilly fabric I purchased in May 2015. I still have enough of this fabric for another 2 quilts.
I love making stripe quilts.
They are simple to piece and fun to quilt. I quilted each stripe cut the same width the same. It turned out so cute!
I used markings on the chevron fabrics to keep things spaced evenly.
Needless to say that Monkey loves the orange minky on the back.
I named this quilt Monster Train because of the cute monsters on the train stripe.
The binding is the same dark purple as the Monster Alphabet quilt.
Quilt Stats #184
Name: Monster Train
Pattern: 1, 2.5, 4, and 6 inch finished stripes
Fabric: Silly Gilly
Amount Used:
Size: About 41 by 56 inches
Batting: Frankensteined Hobbs 80/20
Date Finished: 2016
We love how it turned out!
XX,
Jasmine
P.S. I will be linking up with some of the fun parties on my sidebar. Check them out to see more inspirational quilts.
Tuesday, September 27, 2016
Train Quilt in Progress
After making the Lego quilt with red minky on the back, Monkey thought he needed another quilt with minky. I decided to use the trains left over from his Monster Alphabet quilt.
Monkey had fun helping me pick the colors and layout for his stripe quilt.
I love how fast stripe quilts to together. It was cut and pieced in one afternoon.
This quilt was small enough that I was able to baste it on my big cutting table. It was nice not having to do it on the floor.
I quilted this on my little Pfaff because I already had bobbins wound in matching Aurifil colors.
The machine quilting on stripe quilts is my favorite part.
XX,
Jasmine
Friday, September 23, 2016
Lego Rainbow: A Finished Quilt
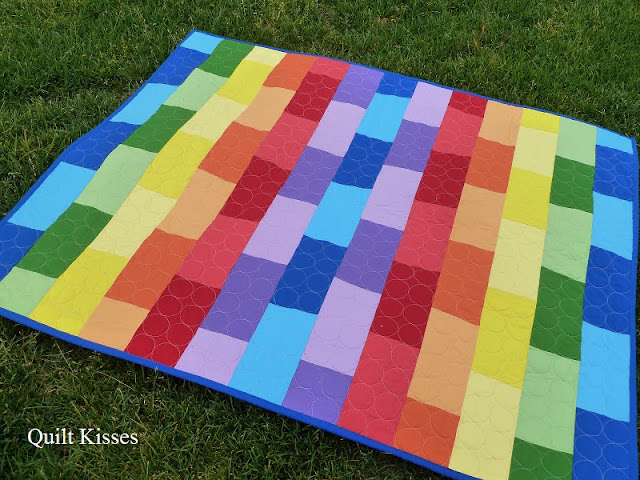
Panda's Lego quilt is finished, and he is a very happy boy.
Of course it is backed in minky. He has informed me that red is his new favorite color. Blue used to be his favorite color and that is why the binding and extra stripe are blue.
I went into more detail about the piecing and quilting in my previous post. The HQ 2" and 4" Clamshell Template worked very well, but the sad thing is that Handi Quilter has discontinued this type of ruler. They now have a Multi Clamshell Ruler which has four different sizes but not as many repeats.
I quilted it in a shiny gray thread and I love how it creates a shadow effect. Even though the circles on real Legos are spread out, it still feels like Legos.
We named this quilt "Lego Rainbow" because of all the colors and their arrangement.
It is very appropriate for my Panda because he organizes his Legos in separate color bins.
Usually this quilt is in his bedroom, minky side up, ready for his Legos.
I love that the minky backing looks like a giant Lego base plate.
All of the fabrics used are Kona solids. The colors I used are: Cardinal, Watermelon, Carrot, Goldfish, Citrus, Buttercup, Grasshopper, Cabbage, Ocean, Alegria, Heliotrope, and Pansy.
Quilt Stats #183
Name: Lego Rainbow
Pattern: 4 x 8 inch finished bricks
Fabric: Kona solids
Amount Used: 4 yards
Size: About 44 x 52 inches
Batting: Warm and White
Date Finished: 2016
This quilt is right at home in our Lego loving house.
XX,
Jasmine
P.S. I will be linking up with some of the fun parties on my sidebar. Check them out for more quilty inspiration.
Tuesday, September 20, 2016
Lego Quilt in Progress
Panda has been asking for a Lego quilt for a long time. I finally got around to making him one. I cut all of the bricks out at 4.5 by 8.5 inches so we could play with them on my design wall. I decided that I could cut some of them down to 4.5 by 4.5 inches after we decided on a layout.
Both Panda and Monkey had fun putting them up on my design wall. Here are some of the layouts we tried.
 |
| Vertical stacks. |
 |
| Random |
 |
| Horizontal rows with extra purple. |
 |
| Horizontal rows with extra blue. |
To make it look more like Legos, I quilted it with a two inch clam shell ruler. I used a Hera Marker every inch to make it easier to match the clam shells into circles.
I rotated the quilt after each row of clam shells so that I was always quilting from left to right.
I think Panda is going to like it.
XX,
Jasmine
Thursday, September 15, 2016
Mom's First Turning Twenty: A Custom Finish
I have mentioned before that my mom teaches the granddaughters (and grandsons who ask) to quilt when they turn 13. She uses the basic Turning Twenty pattern. She decided that she wanted to use two of the kits we purchased last year and make matching quilts for the grandchildren's room at her house. This is the first one she had me quilt for her.
I quilted it with the Cherish design from Christina Cameli's second book.
It is a fun design to fill up a space with using a swirl and three arcs. Sometimes you echo the shape to move to another area.
She had me do the binding by machine for her so it could be finished quickly.
Her second quilt will have the same twenty fat quarters with a different border, binding, and backing. I always love working on projects with my mom.
XX,
Jasmine
Tuesday, September 13, 2016
Talent Night
I participated in a Ward Talent Night at church earlier this year. There were live performances (including my husband playing the piano and Cheetah performing the Samba) and displays around the room. I was volunteered to display some of my quilts. I set up a practice display at home, but then forgot to take pictures at the church.
It looked pretty much the same as the set-up at home. However, I had some fliers by the sign inviting people to my new quilting group. I am happy to say that there are about five people participating in a Ward Quilt Group which I host in my house. It has been so much fun getting to know other quilters and teaching more ladies about sewing and quilting.
So far we have made table runners like in my display, had a quilting demonstration, and made pillow cases. I look forward to more meetings with my new quilting friends.
XX,
Jasmine
Thursday, September 8, 2016
Beach Party: A Finished Quilt
I am happy to share this finished quilt with you today and to let you know that it won the challenge at my local quilt shop. I plan on buying batting with the gift card I won. ;)
I wanted the quilt to feel like overlapping beach balls, so I quilted it in concentric circles. I love the texture it has on the front. (Check out my previous post for more information on how I quilted it.)
I think I love how it looks on the minky backing even more.
I bought a medium gray fabric for the binding because I wanted it to blend in with the border.
Cheetah helped me name the quilt. He called it, "Beach Party."
There aren't very many pretty beaches in Utah, so I took it to my friend's backyard. She has a beautiful lake view, but it is hard to see in the pictures. The lake, mountains, and sky all blend together in the background.
I am thrilled with how this quilt turned out.
Which side do you like better?
I finished the quilt a month early because I misunderstood the deadline, so we enjoyed it in our family room for a while.
Quilt Stats #182
Name: Beach Party
Pattern: My original design inspired by this quilt
Fabrics: Who Loves You stripes by Northcott Fabrics and Fabri-Quilt Pale Aqua
Amount Used: 9 yards
Size: About 48 by 60 inches
Batting: Hobbs 80/20
Date Finished: 2016
Shortly after I finished the quilt, I had a quilty visitor. It was so much fun to meet Vicki and her sweet husband in person!
XX,
Jasmine
Subscribe to:
Comments (Atom)


