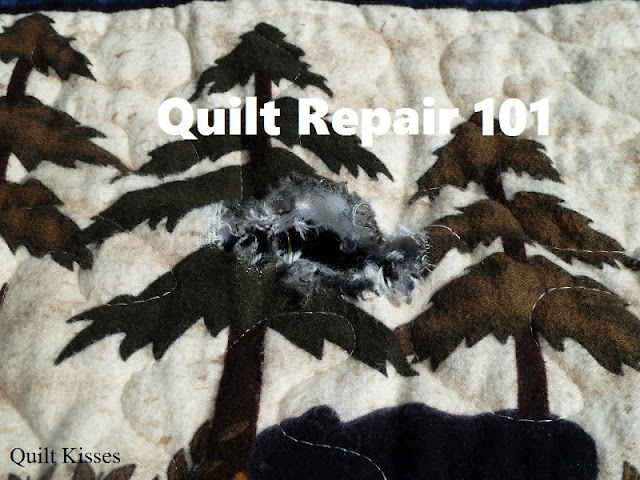
My mom and I finally got around to fixing my dad's cabin quilts. (And I finally got around to blogging about it.) I took a bunch of pictures along the way to show how we did it. It ended up being easier than we expected.
A year and a half ago, I mentioned in this post and this post that mice got into my dad's cabin and damaged some quilts. He has waited patiently (and not so patiently) for them to be fixed. I was all for adding an applique of a leaf or something to cover the holes, but my mom wanted them to look like they had never been damaged in the first place. When my dad would get frustrated he would just say, "just add a mouse trap and call it good." (Thanks to Sandra for that piece of advice.)
Luckily, my mom kept the scraps and we were able to fix them so that they are almost as good as new.
First, we trimmed around the hole and added more batting. (This is Hobbs Wool.) The batting was secured with a large whip stitch.
Second, we used a circle and some Glow Line Tape to try and mark points on the fabric.
Third, we used that template to cut out a circle from the scraps.
Fourth, we used a card board template and a running stitch to turn the edges under.
Fifth, we appliqued it by hand over the hole.
Sixth, we added a similar applique on the back over the hole.
Seventh, we quilted over the patches.
Eighth, we admired the fix.
It is really hard to see when looking at the whole quilt.
(Hint: Look by the second bear from the right bottom corner.)
This same process also works for rectangular patches.
It feels so good to have these fixed and ready to be used. My dad loves having them back at the cabin. The beds seemed so empty without them.
XX,
Jasmine
P.S. I will be linking up with some of the fun parties on my sidebar. Check them out for more quilty inspiration.


What a clever and beautiful fix for the quilts! Great description and photographs, too, to help others who may be in need of a clever solution.
ReplyDeleteWonderful tutorial on how to repair quilts. You and your mother are so clever and talented!
ReplyDeleteA great save!! Thanks for the tute(but I hope never to need it!).
ReplyDeleteWow! I am impressed!!
ReplyDeleteAbsolutely stunning. So glad your wise Mom insisted you repair so nicely. I would have been so sick at heart over this, but an excellent repair job.
ReplyDeleteI agree with your mom about fixing it like if it had never been damaged, you guys did a great job at repairing your dad's quilt, good thing you still had scraps from this quilt. Well done!!
ReplyDeleteAn amazing save! You've inspired me to dig out some older quilts that need to be mended (after Christmas)....Great job! Yes, that "menopausal melon", Sandra, is quite special, both in humor and wisdom. Merry Christmas....glad you're back to posting regularly.
ReplyDeleteWow, great fix! So nice that your mom kept the scraps and you were able to exactly match the print.
ReplyDeleteLoved seeing how you fixed the quilts. We've had a couple of quilts at our cabin where a mouse has made a hole or two. You did a beautiful job repairing the damage!
ReplyDeleteAmazing job! U jibe tier dad must be thrilled!
ReplyDeleteFantastic fix, I'm squirreling this one away as I think I will need it sometime!
ReplyDeleteThe fixes look fabulous, Jasmine! You and your mom have done an incredible job. Thanks so much for sharing your secrets for the fix. Wishing you and yours a blessed Christmas and Happy Stitching!
ReplyDeleteNo one could do a better repair job than these Jasmine. Amazing work by you and your Mom!
ReplyDeleteThis is so great! I'm definitely going to keep this one bookmarked for future use. You're right - you can hardly tell the fixes are in there.
ReplyDeleteSpectacular repair work!!!
ReplyDelete