Tuesday, September 13, 2016
Talent Night
I participated in a Ward Talent Night at church earlier this year. There were live performances (including my husband playing the piano and Cheetah performing the Samba) and displays around the room. I was volunteered to display some of my quilts. I set up a practice display at home, but then forgot to take pictures at the church.
It looked pretty much the same as the set-up at home. However, I had some fliers by the sign inviting people to my new quilting group. I am happy to say that there are about five people participating in a Ward Quilt Group which I host in my house. It has been so much fun getting to know other quilters and teaching more ladies about sewing and quilting.
So far we have made table runners like in my display, had a quilting demonstration, and made pillow cases. I look forward to more meetings with my new quilting friends.
XX,
Jasmine
Thursday, September 8, 2016
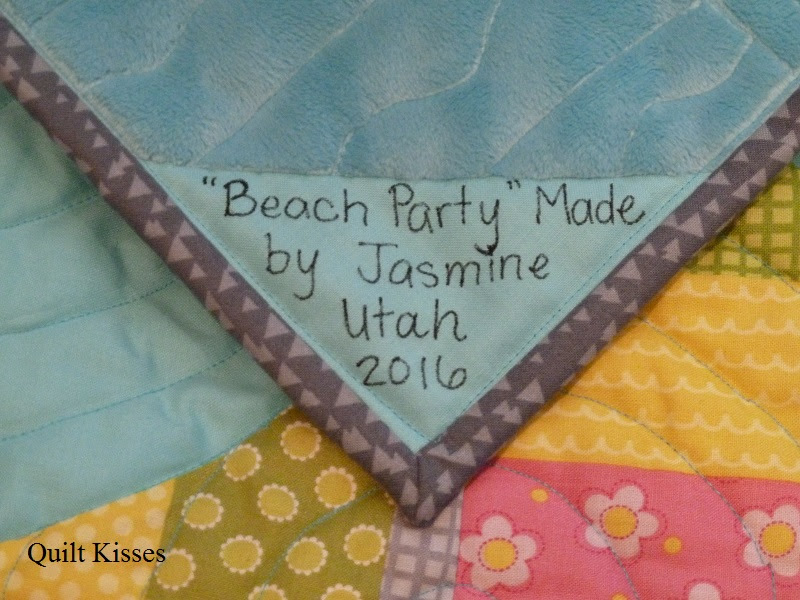
Beach Party: A Finished Quilt
I am happy to share this finished quilt with you today and to let you know that it won the challenge at my local quilt shop. I plan on buying batting with the gift card I won. ;)
I wanted the quilt to feel like overlapping beach balls, so I quilted it in concentric circles. I love the texture it has on the front. (Check out my previous post for more information on how I quilted it.)
I think I love how it looks on the minky backing even more.
I bought a medium gray fabric for the binding because I wanted it to blend in with the border.
Cheetah helped me name the quilt. He called it, "Beach Party."
There aren't very many pretty beaches in Utah, so I took it to my friend's backyard. She has a beautiful lake view, but it is hard to see in the pictures. The lake, mountains, and sky all blend together in the background.
I am thrilled with how this quilt turned out.
Which side do you like better?
I finished the quilt a month early because I misunderstood the deadline, so we enjoyed it in our family room for a while.
Quilt Stats #182
Name: Beach Party
Pattern: My original design inspired by this quilt
Fabrics: Who Loves You stripes by Northcott Fabrics and Fabri-Quilt Pale Aqua
Amount Used: 9 yards
Size: About 48 by 60 inches
Batting: Hobbs 80/20
Date Finished: 2016
Shortly after I finished the quilt, I had a quilty visitor. It was so much fun to meet Vicki and her sweet husband in person!
XX,
Jasmine
Tuesday, September 6, 2016
Challenge Quilt in Progress
I participated in a quilting challenge as part of a club at my local quilt shop this summer. Although this quilt is already finished, I wanted to share the process here on my blog. The challenge was to use at least 90% of a fat quarter of the stripe print on the left. I added the same print in the second colorway to brighten up the quilt.
The bright colors reminded me of beach balls and flip flops, so I decided to make a summery quilt. I cut the stripes into 6.5 inch square fence rail blocks and then used the Quick Curve Ruler to make them quarter circles. I cut some a little bigger than 6.5 inches so the prints could also be used for the concave side of the curve for a more modern look.
Originally I was going to have each 12 inch block have three quarter circles and one concave section like this quilt. However, Cheetah came in my room and hated it. He rearranged the blocks so they would be symmetrical. They ended up staying that way. He is rather proud of his layout and tells me frequently that I can thank him for it. Lol.
I ended up using a lot more than a fat quarter of the challenge print because I used it in half the blocks and used it for the border.
Here is the top before it was quilted.
I quilted it on my small Pfaff because my Tiara was being serviced.
I started out by using the walking foot to stitch in the ditch to stabilize the quilt.
Then I used some circle rulers to mark concentric circles with my Hera marker.
I learned that if I used a side light instead of direct light the markings were much easier to see.
The quilting turned out even better than I imagined.
I will share the finished quilt soon.
XX,
Jasmine
Friday, September 2, 2016
New Design Wall
Shortly after we hung up my mini quilts, I got a new design wall. It is my old flannel sheet taped to a one inch thick piece of foam insulation board.
It is stiff enough that I can lean it against the wall, and great for smaller quilt projects. I am still figuring out what to do for larger projects, but here is a sneak peek at the first quilt I used it for.
I did cut the four foot wide board a little shorter to make it fit the space a little better. When it is not being used I can hide it in my closet.
XX,
Jasmine
Tuesday, August 30, 2016
Mini Quilt Display
First, I would like to thank everyone who checked up on me over the summer. My blogging break ended up being longer than I originally planned. ;) I had a fabulous summer filled with family, friends, and fun. Now that the boys are all back in school, I plan on getting back to blogging.
When I shared pictures of my new sewing studio last May, I showed this stack of mini quilts I was hoping to hang on the wall.
Thanks to the help of my husband and Ikea, they are now on display in my studio.
I decided that I wanted rods with clips around my studio so that I can change out the mini quilts whenever I feel like it. I used the Fintorp rails and the Syrlig clips from Ikea for my mini quilts.
My husband hung two rails on each side of my window for a total of four mini quilts.
He hung a fifth rail above my old cutting table near the door to display a fifth quilt.
Then he cut two rails a little smaller and hung them up together above my design wall area. This way I can either use my design wall or hang up a quilt. (This is Monkey's Monster Alphabet quilt I borrowed for this picture.)
I enjoy seeing a quilt more than an empty design wall.
Having my mini quilts displayed makes my studio feel so much more like home.
XX,
Jasmine
Monday, June 6, 2016
Jackie's Quilt: A Custom Finish
I was commissioned by my mother's friend Jackie to quilt and bind this quilt. It is a gift for her grandson's wedding. Her daughter pieced the quilt top and prepared the binding. I did the rest. I believe most of the fabrics were designed by Angela Walters and I had so much fun quilting this.
Jackie chose a dimpled minky for the backing and I learned one thing. The dimpled minky is so much stretchier than the flat/smooth minky. Using the Hobbs 80/20 batting and basting spray helped stabilize it during quilting. It turned out beautifully, but I will be avoiding the dimpled minky from now on.
I basted this queen size quilt on the floor of my craft room by moving my cutting table in front of my future design wall.
Then I quilted it on my Tiara. I set up an extra table to the side and used my ironing board to help hold the weight of the quilt.
When I asked Jackie how she wanted it quilted, she just said, "I trust you." While that was sweet, I told her that I needed more input than that. I pulled out my Floating quilt and she realized that there really were many options to choose from. She ended up choosing one of my favorite designs: swirls with curls or hooked swirls.
I love how it turned out and I am sure her grandson and his wife will love it too.
XX,
Jasmine
P.S. I will be linking up with some of the fun parties on my sidebar. Check them out to see what other quilters have been up to.
Thursday, June 2, 2016
Eagle Pledge: A Custom Finish
My Dad is on the Scout Committee in his troop and loves to help with Eagle Courts of Honor. So he asked my mom to make him this quilt to display at the courts of honor. It is an embroidery pattern by Anita Goodesign.
(The carved eagle also belongs to my dad.)
The exciting thing is that Cheetah's eagle court of honor is the first one it was displayed at.
Yes, Cheetah is now an official Eagle Scout.
My mom did all of the embroidery and pieced the blocks together.
I added another layer of Warm and White batting and quilted it. While it may look like a lot of quilting...
Most of it was part of the embroidery. I just stitched in the ditch to stabilize it, added a half inch binding, and added loops for hanging.
It is such a neat quilt.
My mom did an amazing job and my dad just loves it!
XX,
Jasmine
P.S. I will be linking up with some of the parties on my sidebar. Check them out to see more amazing projects.
Subscribe to:
Posts (Atom)