Wednesday, July 8, 2015

Quilting the Lantern Quilt


Because this lantern quilt is for my sister, I asked her if she would rather have more detailed quilting or a minky backing.  She chose the more detailed quilting.  I had so much fun quilting it and watching it transform, that I decided to take pictures after each step.

Here is the finished quilt top.


The first quilting I did was to echo the columns on each side of the seam.  This was all done freehand without any rulers to keep me straight.  ;)


Then I quilted continuous spirals through the lanterns and bars.


Then I quilted a loose wiggle over the background columns.


Quilting really does transform the quilt!  I will share the finished quilt this Friday.

XX,
Jasmine

P.S.  I will be linking up with some of the fun parties on the sidebar.  Click on the links to see what other quilters have been making.

Monday, July 6, 2015

Lantern Quilt in Progress


I bought a Quick Curve Ruler last November while planning to make a quilt for my sister using the Urban Abacus pattern.  I have been procrastinating because of the curves, and because I wanted to change the dimensions of the beads/lanterns.

After speaking with one of the designers at the HMQS, who thought it would work very well, I decided to give it a shot.  While my quilt is about the same size as the one in the pattern, it has half of the beads/lanterns.

I ended up cutting my lanterns 8 inches wide, and the bars 2.5 inches wide.  Then I experimented with how wide I wanted the background to be cut (5 inches wide).  I am so pleased with how the pattern looked with my sizes. (I kept all the heights the same as in the pattern.)

It was so much fun watching the quilt transform with each step.

From the cut pieces.


To the sewn blocks.


To the finished quilt top.


One other change I made was to extend the bars on the top and bottom to make the lanterns float a little more.  (I didn't like the look of the binding right up next to the lanterns/beads on the top and bottom of the quilt.)


I also did the piecing a little bit different than I normally do.  I usually sew all the blocks, press all the blocks, then square up all the blocks.  However, I found it much easier to work in batches of four.  I would piece four...


Then press them, cover them with a magazine and leave them to cool.


While they were cooling, I would sew the next four.  Then square them up once they were cool and flat.  It worked really well.

I had fun sewing the quilt top and think that the Urban Abacus is a great beginner Quick Curve Ruler pattern.  There are no points that have to match up which was really nice!

Now that I am no longer afraid of the ruler and sewing, I look forward to trying more of their patterns.  I already have their sampler quilt pattern...

XX,
Jasmine

P.S.  I will be linking up with some of the fun parties on my sidebar.  Check them out for lots of quilting inspiration.

Thursday, July 2, 2015

Quilt Photo Albums


I mentioned my new quilt photo albums in my last post, and thought I would go into more detail today.  :)

While I love blogging as a record of my quilts, I decided that I wanted something more tangible as a record of my quilts.  I spent several days selecting, uploading, and printing pictures of all of my quilts so far.  (Good news is that Costco gives you a discount on 4 x 6 photos if you order more than 100 at a time.)   Then came the time to actually organize the photos.

I started out by using divided sheet protectors.  The ones I used are Albums Made Easy and are very similar to the ones made for Project Life.


Then I used some lined journaling cards to write the quilt statistics.  One nice thing is that they have different styles of divided sheet ptotectors.  I could choose what worked best for the quilts which would be back to back.  It was also nice that you can just slip in the 4 x 6 photos.  So that is what I did for my first 100 quilts.  (I will admit that some still need the journaling done.)

I was feeling limited by the dividers, so I decided to do some very simple scrapbooking for the next 100 quilts.  I have to say that I like the second way lots better!  I selected cardstock which coordinated with the photos, trimmed them, stuck them down, and added some simple journaling.


I had so much fun doing this that I even printed pictures of quilts for my mom and started a different album for her using the Albums Made Easy sheet protectors.  She loves it!

The biggest thing I learned by doing this is if you are planning on printing 4 x 6 photos of your quilts, make sure you leave room on the sides to crop the picture without cropping your quilt!  I had been taking pictures of quilts so I wouldn't have to crop them before including them on my blog.  Some of them lost a little on their sides.  So now I am taking extra photos:  Some zoomed in and some zoomed out.

What do you do with pictures of your quilts?  Do you print them, or just keep them digital?

XX,
Jasmine

P.S.  I will be linking up with some of the fun parties on my side bar.  Check them out for lots of inspiration.

P.P.S.  I wish everyone celebrating the 4th a safe, happy, holiday weekend!

Tuesday, June 30, 2015

Quilt Display


I was honored to be asked to have a display in the professional talent night at church for a second year.  (I won't mention that I think they were a little desperate for displays this year after they changed the date, maybe.)  You can see the display I set up last year here.  Out of the seventeen large quilts shown, only one was made before my previous display.   I wasn't as nervous as last year because I knew what to expect.

I loved how portable and free standing my new quilt ladder was.  (In case you missed it, I have a tutorial for the side-by-side quilt ladder here.)


The display this year was definitely brighter!


It was fun including my favorite quilts (Modern Farmer's Wife, Floating, and Quilty Kisses).


I kept smaller quilts in the basket again.  They were great for showing examples of different quilting styles.


One thing that was new this year is a quilt photo album I made.  (More on that in a future post.)


The best part of the whole evening was when three 8-9 year old boys came over and had to look at every single page in the album.  You know how much I love boys who are interested in quilts!

One reason why I was less nervous this year is because I set up a practice display at home.


It helped me keep a balance of height and color, even if it did make a MESS of my family room.


(Just keeping it real!)

XX,
Jasmine

P.S.  I will be linking up with some of the fun parties on my sidebar.  Check them out to see what other quilters have been making.

Friday, June 26, 2015

Positive Hope: A Finished Quilt


I recently found out that one of my husband's cousins was diagnosed with cancer.  I wanted to make her a quilt, so I asked her what her favorite color was.  Turns out she loves pink!  I wanted to finish it before she starts chemo therapy, so I picked one of my favorite easy patterns.

This is a plus quilt made from sixteen quarter yard cuts of fabric.  Each quarter yard is then cut down to five eight inch squares, put on my design wall, and sewn into a quilt top.  That took me about five hours.

The fabrics I used are a mix of what I could find at my LQS including: Bandanna, Pam Kitty Garden, Summer Song 2, Timeless Treasures Sketch, and others.  I love how they all play together.  I decided to add aqua as an accent color, to break up the pink a little.  I was told that aqua is a very healing color.  :) So I chose four dark pink, five medium pink, four light pink, and three aqua fabrics.


The hardest part was deciding how I wanted to quilt it.  I ended up deciding to quilt with a large stipple and include simple flowers.  This design came from Christina Cameli's first book, First Steps to Free Motion Quilting.  The basting and quilting (on my Tiara) took less than three hours.


To keep the flowers evenly spaced, I decided to quilt one in each 7.5 inch square.  It looks so cute on the minky back.  (My boys were adamant that it NEEDED minky.)


Then I added the binding by machine which took a little over an hour.


I had a finished quilt in about 9 hours.  Of course that was broken up over a period of five days. (Quilting time is harder to find in the summer with all of our trips to the library and other fun places.)

I was going to call it "Positively Pink," but my husband wanted a more meaningful quilt name.  Together we decided to call it "Positive Hope."  I hope it brings his sweet cousin comfort during this difficult time.  


All of my five petal flowers are lopsided, but I think that is part of the charm.


The minky backing was hard to photograph.  It is a little too bright outside...


And then I had helpers testing it out inside.


I'm not the only one who likes the back more than the top.


Wolfie and Coconut even needed their own picture.  LOL.


Quilt Stats #143
Quilt Name:  Positive Hope
Pattern: Plus quilt from 8 inch squares
Fabrics Used: Bandanna, Pam Kitty Garden, Summer Song 2, Sketch, and more
Amount Used: 7 yards
Batting:  Hobbs 80/20
Size:  About 60 x 75
Date Finished: June 2015
What I learned:

  • When your backing is the same width as what your finished quilt top will be, it is okay to sew squares together with a generous quarter inch seam.  

I hope to deliver this quilt to her this weekend.  


XX,
Jasmine

P.S.  I will be linking up with some of the fun parties on my sidebar. Check them out to see what other quilters are up to.  :)

Tuesday, June 23, 2015

More Bags


It is no secret that I enjoy making bags.  Recently I took my mom's projects from our Handi Quilter University and made her a bag.  She didn't get as much quilting done as me, so her bag is a little bit smaller, and the sampler quilt made its way into the pocket and lining of her bag.


She really loves her new bag.  (I just have to make sure my boys don't put my stuff in there by mistake when we visit grandma.)

I have also finished some more drawstring bags to give as gifts.  The large one was for Panda's soccer coach, and the little ones are for friends.


They all have a fun black and white checkerboard lining.


I love having some of these on hand for my boys to take to parties.  Besides, quick finishes are so much fun!

XX,
Jasmine

Friday, June 19, 2015

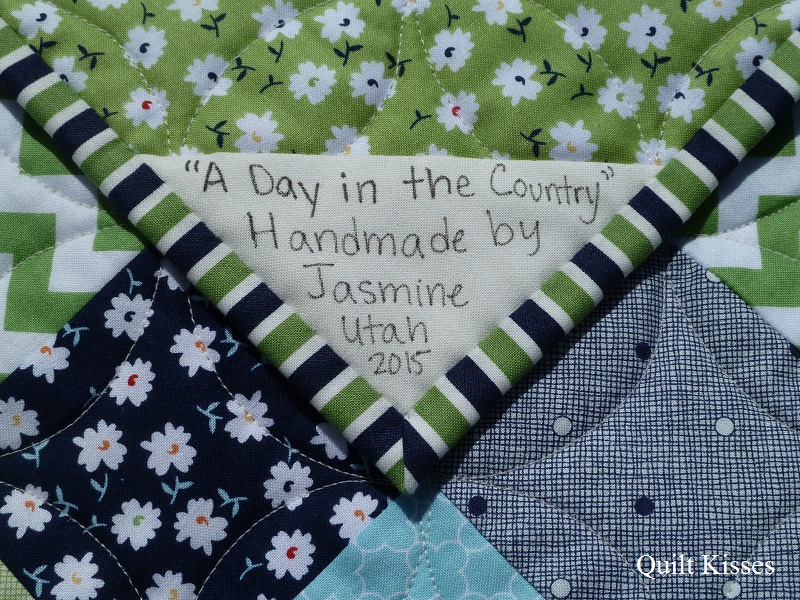
A Day in the Country: Finished Challenge Quilt


This was such a fun quilt to make, and I really enjoyed participating in my first quilting challenge at my LQS.  We were to use at least 80% of a fat quarter of Country Girls by Tasha Noel and make something.  I went into a lot more detail of my process in my last post.


I basically fussy cut the cute pictures and surrounded them by patchwork squares in aqua, green, and navy.  I love that some are squares and some are rectangles.


I quilted it with my Tiara using a 4 inch long arm circle ruler.  It was the perfect size circle for these 3 inch finished squares.  I wanted the fussy cut shapes to stand out a little more, so I just quilted inside the squares/rectangles a quarter inch.  That made it so all my quilting was continuous.  The combination of mostly round with a little straight quilting is so cool.


The unexpected straight lines are fun even on the back.


I decided to call it "A Day in the Country" because of the fabrics used in the quilt.  I used Country Girls by Tasha Noel and Daysail by Camille Roskelley.


The binding is the navy, green, and cream stripe from Daysail.  It ties all the colors together so nicely.

The backing fabric is from Vintage Happy by Lori Holt.


The sun kept playing peek-a-boo behind the clouds while I was taking pictures.  It made for an interesting photo shoot.


Just minutes after I took the picture above, I took the picture below.


What a difference the lighting made.

Quilt Stats #141
Quilt Name:  A Day in the Country
Pattern: Patchwork with 3 inch finished squares and fussy cut pictures
Fabrics used: Country Girls, Daysail, Vintage Happy, Riley Blake Basics, and more
Amount used:  4.25 yards
Batting: Hobbs 80/20
Size: About 39 x 48 inches
Date finished: May 2015
What I learned:

  • I need to remember to include more blenders and not just prints.  I had to go buy more coordinating fabrics because it was too busy.
  • Quilt challenges are fun!

I am looking forward to getting my quilt back at the end of the month so I can hang it back up in my kitchen.


XX,
Jasmine

P.S.  I will be linking up with some of the fun parties on my sidebar.  Check them out to see what other quilters are making.