Friday, October 3, 2014

Turning a Comforter into a Quilt


Have you ever wondered what a quilt is technically?  I have.  According to Wikipedia, "A quilt is a type of blanket, traditionally composed of three layers of fiber: a woven cloth top, a layer of batting or wadding, and a woven back, combined using the technique of quilting."  I once saw a definition at a quilt show which went on to say that quilts are stitched together, not tied.  Something tied is more of a comforter.  So I have always considered tied items blankets or comforters. 

When I was pregnant with Monkey I didn't have much energy for quilting, so I tied a simple minky comforter for the twin bed in his nursery


I trimmed all three layers with right sides together, stitched around it and turned it right side out.  Then I put it on large quilting frames and tied it.  I stitched around the edge and in the ditch around the border.  I did this because I did not want to bind it as it was made entirely of minky with a polyester batting. 

Now that Monkey has been sleeping in the big boy bed for awhile, I was getting tired of all the ties.  For some reason the ties on the argyle minky kept coming undone and driving me nuts.  Even in the picture below you can see some ties are missing.  The ties on the brown minky stayed nice and tight. 


So I decided to take all the ties out and quilt it.  I used my Janome 6500 with the walking foot to quilt it on some of the white printed lines. 


I just clipped the ties as I came to them.  I figured it would be like taking out pins in a pin basted quilt. 


It actually worked very well, and I am so pleased with the results of three hours' work. 


I now consider this a quilt!  What do you think?  It has three layers with batting in the middle and is stitched together by machine. 


The borders do ripple a little because of how I originally put it together three years ago.  But the back isn't too bad either. 


I know it could have been a lot worse!


The important thing is that Monkey loves his quilt and the ties are no longer driving me batty. 


Quilt Stats #114
Name:  Minky Argyle Quilt
Fabric: 60 inch wide minky
Amount used: 6 yards
Batting:  Low loft polyester
Size:  About 70 x 90 inches
Date finished:  September 2014
What I learned:
  • Some things are better quilted.
  • I can quilt something which was once tied.
  • If I were to do something like this again I wouldn't quilt that outside border until the inner panel was quilted. Then I would bind it more traditionally. 
XX,
Jasmine

P.S.  I am linking up with Can I Get a Whoop Whoop and Finish it up Friday.

The Month of September & October Goals

Even though September was a busy family month I was much more productive.  I was able to completely finish two quilts and lots of little projects.  Plus a couple more things I haven't even blogged about.   ;)

Berry Pie was the first quilt I finished.  It was my September goal for A Lovely Year of Finishes. 


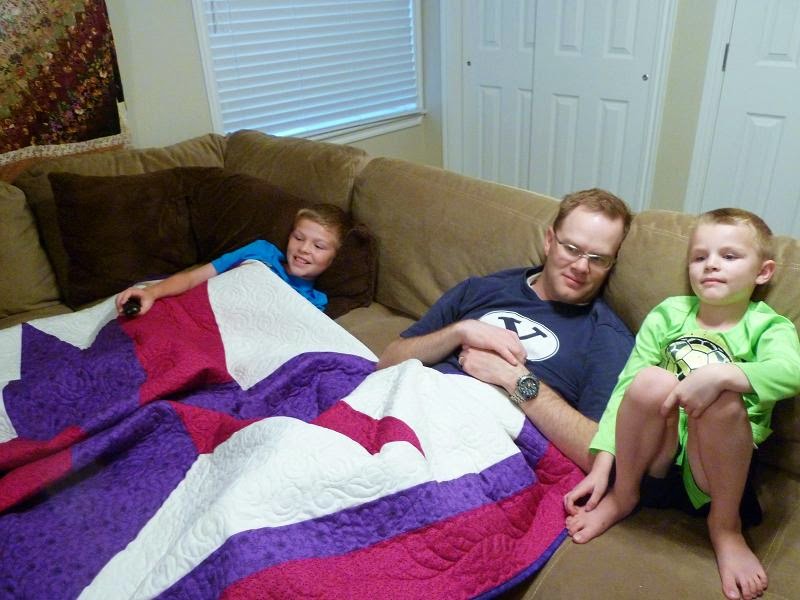
It makes me so happy to see this quilt used frequently, and not just by my sons.  We all use this quilt!  (Even my hubby.) 


The second quilt I finished is the sneaky sewing for my husband.  I designed this quilt specifically for him, and I love how it turned out.  I call it "Bear Tracks."


My small projects included pillows, blankets, and a bag.  I wrote a tutorial for how I made the simple minky pillow cases... 


 And organized my scraps while discovering that I have used more than 200 yards of fabric this year. 


 Plus I turned a blanket...


Into a quilt! 


[More on that finish in my next post.] 

Holy Cow!  I am tired just thinking about it.  Because I also spent a lot of time celebrating! 


However, I was able to do some hand sewing during soccer practice and piano lessons. 


I now have one flower worth of squares done. 


I hope I can still do a lot in October.  My goal for A Lovely Year of Finishes is to make a Halloween quilt. 


Plus, I need to continue with my sneaky sewing for the three boys while disguising it with other projects. 

Wish me luck!

XX,
Jasmine

Monday, September 29, 2014

My First Drawstring Bag


I finished my first (of many, I'm sure) drawstring bag.  I used the tutorial by Jeni at In Color Order for the design, but I used my own measurements to make it bigger.  I cut the soccer fabric at 18 inches square.  The black fabric was four inches wide, and the lining was 21.5 inches long.  It used 8 feet of ribbon. 

It is plenty big.  It can hold a soccer ball, cleats and shin guards, plus a water bottle and snack. 


I made it as a thank you gift for Cheetah's soccer coach, but now I need to make another one for Cheetah.  He loved it! 


And as you all know, if I make one for Cheetah... I will have to make one for Panda and Monkey as well!  Like I said, the first of many. 

XX,
Jasmine

Friday, September 26, 2014

Bear Tracks: My Original Design


My husband's Christmas quilt, "Bear Tracks" is now finished!  Jan unknowingly helped me name this quilt when she referred to it as bear tracks in her comment on my first post about the quilt.  I am so grateful for her help, because I couldn't figure out what to call it.  The names that came to my mind were "Walk in the Woods" or "Bear Walk."  I like "Bear Tracks" much better. 

I designed this quilt because I couldn't find any outdoorsy prints to do a simple patchwork.  I decided to use bear paw blocks to match the fuzzy minky I wanted to use for the back. 


After I sketched it out, I went to buy the fabric when my LQS was having a great sale.  I tried to select fabrics which would give the quilt an ombre feel, and I think I succeeded. 


I just love taking a pile of fabric and turning it into a cuddly quilt.  It turned out even better than I imagined.


It was actually made at my husband's request.  He asked me, "Do I get a fuzzy quilt?"  So this is his Christmas present, finished nice and early.  But now I have to wait three months before giving it to him. He requested a longer quilt (7 feet instead of 6) and an outdoorsy look.  I think I fulfilled his request.  He has officially been banned from reading my blog until Christmas. 

Because this is to be a cuddle quilt, I quilted it simply by stitching in the ditch. 


I love the way it looks on the back. 


I added a label to one corner, and used Leanne's tutorial which has you stitch around it before hand sewing it to the quilt.  This extra step was so worth it. 


I used the same green from the corners for the binding which I sewed down by machine. 


It looks great in our family room. 


But he better be careful, because other people may try to confiscate his quilt.  I had to reclaim it from Cheetah to hide it until Christmas.  (Good thing Cheetah will receive his own quilt this Christmas.)


Quilt Stats #113
Name: Bear Tracks
Pattern: Designed by me
Quilting Design: Stitch in the ditch
Fabric: Miscellaneous browns from my LQS
Amount Used: 8 yards
Batting: Warm and White
Size: About 60 x 84 inches
Date Finished: September 2014
What I Learned:
  • I like stitching around the edge on the label before hand sewing it to the quilt.
  • It is easier to ban my husband from the craft room for sneaky sewing than my children. 
  • It is fun to design a quilt with someone special in mind. 
So now I have one Christmas quilt finished and three more to do.  It will be a bit harder to find my sneaky sewing time.  Hopefully my husband will take them for more long bike rides and other father/son activities.   And my husband is now able to come in the craft room, as long as he doesn't start looking in the boxes or other containers where the quilt may be hiding.  ;o)

XX,
Jasmine

P.S.  I will be linking up with Finish it up Friday and Can I Get a Whoop Whoop

P.P.S.  I am also linking up with Jennie of Porch Swing Quilts for her Santa's Sweatshop linky party. 

Thursday, September 25, 2014

Minky Pillow Case Tutorial


~Plus~ Tips for dealing with the fuzzy minky mess. 

I have had so much fun making pillow cases out of minky, that I thought others would want to see how easy they are.  They make great gifts! 

Supplies:
2/3 yard of minky (60 inches wide)
Coordinating Thread
1.5 inches of sew-on Velcro (optional)

Note:  This fits a standard size pillow in the United States.  (Approximately 19 x 26 inches)

1.  Keep the minky folded in half and smooth it out on your cutting mat.  My cutting mat has a grid that is 24 x 36 inches.  (The cutting process was made easier for me because my cutting table is set up as an island in the center of my room.) 


2.  Square up one of the long edges of fabric. 


Hint:  When I have such a long cut to make I use two rulers.  I hold the right one in place while I slide the other up.  This keeps the edge nice and square. 


Note:  I like to put the trimmings straight into the garbage to keep down the fuzzy minky mess. 

3.  Cut the minky so it is 20.5 inches wide.  (This is really easy for me with my 20.5 inch square Omnigrip ruler.)


I slide it up to finish the cut. 


Note:  If you can't access all the sides of your mat like me, it is better to rotate your mat than to rotate your fabric.  It helps keep down the fuzzy minky mess. 

4.  Trim off both selvage edges. 


It now looks like this. 


5.  Clean up the fuzzy minky mess.  I carefully lift up the edges and wipe it up with a batting scrap. 


This minky actually wasn't too bad. 


Then I take a lint roller to the edges of the minky. 


Note:  Minky does not fray.  It is like giving it a hair cut.  Once you clean up the little "hairs" it is good to go. 

6.  Create a 1 inch hem along both short (20.5 inch) sides.  I folded the edges under 1 3/8 inch and pinned (no ironing). 


I used my walking foot when sewing on the minky. 


7.  Lay the hemmed minky right side up on your cutting mat. Line the edge up with the 26 inch mark on your mat. 


Note:  This is the hem which will show, so if one looks better than the other use it here. 


8.  Fold the minky at the 0 inch mark so that the right sides are together.  It will be longer than the 26 inches. 


Pin both sides to the 26 inch mark. 


9.  Fold the extra flap around the bottom piece. 


Pin in place.  (I still left the original pins in.)


It will look like this:


10.  Sew both sides with a half inch seam allowance starting at the end near the opening.  Back stitch at both ends. 


It will now look like this:


11.  Turn it right side out and insert the pillow. 


The pillow will hide nicely under the inner flap. 


Enjoy!


Note:  I made three of these, and they seemed a little floppy on the bed (especially the more plush angry bird pillow case).  So I decided to add a velcro closure. 


~Optional~

13.  Sew 1.5 inches of velcro to the wrong side of the hem which shows.  Center it along the edge. 


Note:  I used a straight stitch because it will be visible on the outside. 


14.  Lay the pillow case flat on the table, and line up the other piece of velcro.  


Carefully pin it in place so it doesn't go through both layers of fabric. 


15.  Carefully sew the second piece of velcro in place.  Be sure not to catch another part of the pillow while sewing.  


Note:  I used a zig zag stitch because it secures it better and will not show.

16.  Put the pillow back in and enjoy! 


I think they look a lot better with the velcro sewn on. 


I hope you enjoyed this tutorial (and that it made sense).  Please leave a comment if you have any questions. 

I would love to see your project if you use this tutorial.  :)

XX,
Jasmine

P.S.  I based this pillow case design off of a cotton pillow case I bought at Ikea.  The minky just makes it so much better! 
P.P.S. I will be linking up with Finish it up Friday and Can I Get a Whoop Whoop.